Tip: How to create multiple menus on a CD or DVD (Two levels of menus)
Sometimes only one menu interface window is not enough. The tip below shows how
to create a menu system that contains one main menu and two sub menus.
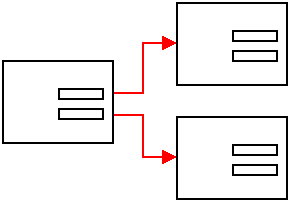
The user can navigate between the main menu and the two sub menus by
clicking on buttons on the menu. The picture below shows how the
main menu and the two sub menus are linked together (in the menu
system that we create with this tip).
There is a
built-in wizard in CD-Menu Creator
In CD-Menu Creator 2015 we added a wizard to the editor
that simplifies the process of creating a menu system with two
levels of menus. You can open the wizard by choosing the File -
Create Sub Menus menu item. Below we will show how to use the
wizard to create a menu system with one main menu and two sub menus:
How to create a menu system with a main
menu and two sub menus
- Start CD-Menu Creator.
- Choose a new empty CD/DVD project.
- Save the project to your hard disk, for example with the
filename MainMenu.cdp.
- Choose the Create Sub Menus menu item in the File
menu. The following window will be opened:

- It is the first step in the Create Sub Menus wizard. Click Continue to continue. The following step in the
wizard will now be shown:
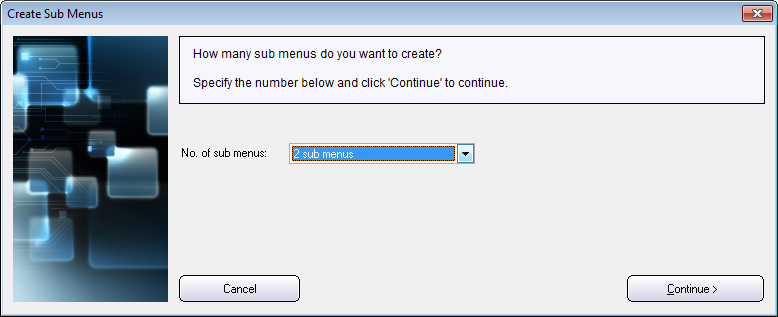
- Choose "2 sub menus" in the combo box to
the right of No. of sub menus. It is the number of sub
menus that we will create.
- After you have selected the number of
sub menus,
click Continue to continue. The following step in the wizard will now
be shown:
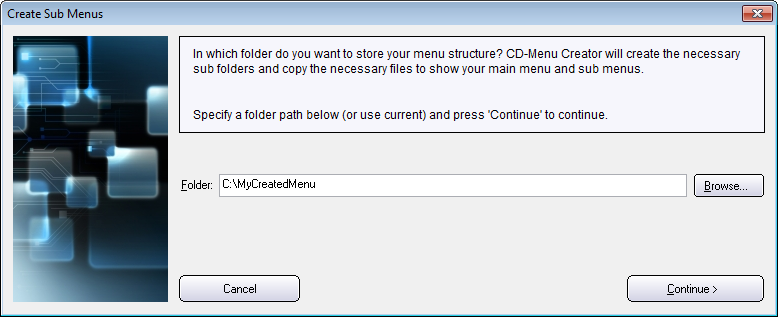
- In this step of the wizard we will specify a folder path
where our menu structure will be created. You can enter the
folder path directly in the folder text box or click on the
Browse button to browse for a folder.
- After you have entered a folder path, click the Continue
button
to continue. Now is this step in the wizard shown:
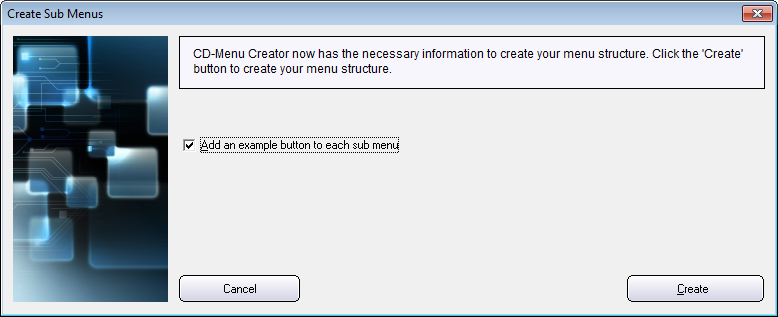
- If the Add an example button to each sub menu option
is checked, all sub menus will have an example button that opens
a document. The purpose of this is to demonstrate how file paths are
built in sub menus. This simplifies when you add your own
buttons and files to the sub menus.
- Now click the Create button. The menu structure
will now be created in the folder that you specified at step 8
above. When the creation process is over (it
usually takes a few seconds) the following step in the wizard
will be shown:
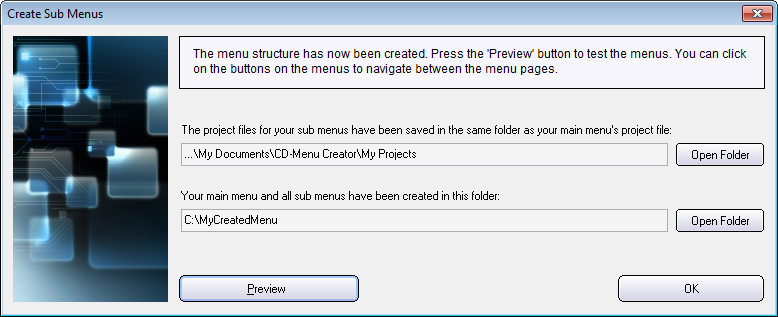
- It is the final step in the wizard. From this window you
can:
- Open the folder with all project files (.CDP files).
- Open the folder where the menu system has been created.
- Preview the menu system.
- To preview the menu system, click the Preview button.
A menu window like the one below will be shown on your screen:
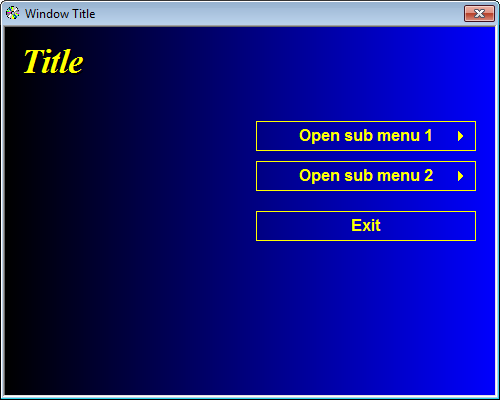
- Click on the "Open sub menu 1" button in the menu
interface to open the first sub menu:
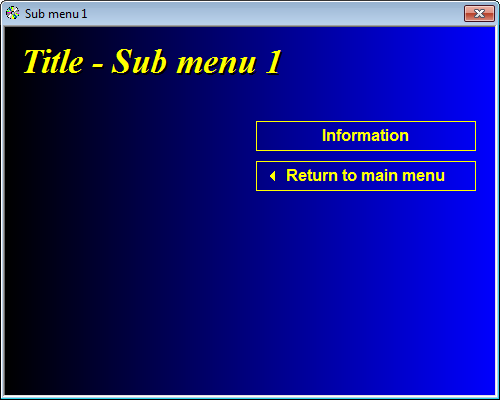
- Click on the "Return to the main menu" button to
return to the main menu.
- Click "Exit" to close the main menu.
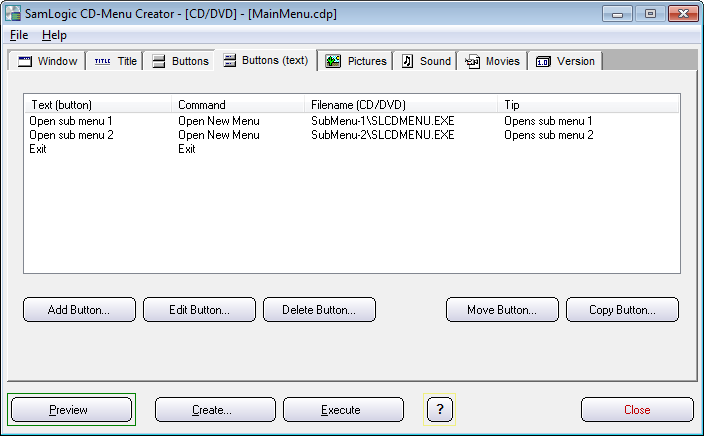
- All buttons in your main menu has been automatically added
to the button list in the Buttons (text) tab:
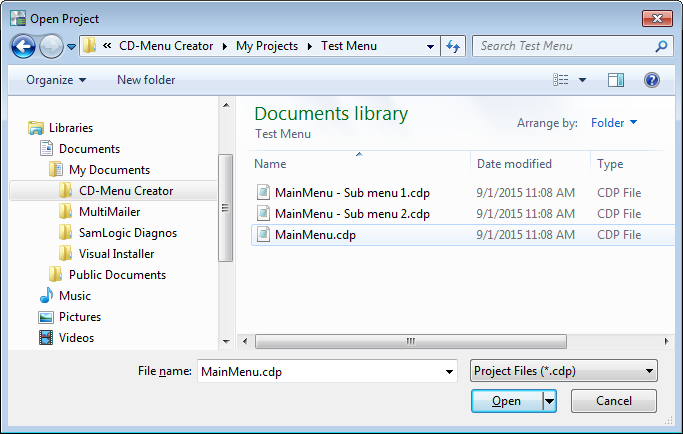
- All project files (.CDP files) for the sub menus have been automatically saved
to the same folder as your main menu's project file. The
filenames of the sub menu project files will be the same as the
main menu, but with the text " - Sub menu #.cdp" added at the
end. The "#" character will be replaced with the number of the
sub menu. So, if for example, the filename of the main menu's
project file is "MainMenu.cdp", the filename of the project file
for sub menu 1 will be "MainMenu - Sub menu 1.cdp" and the
filename of the project file for sub menu 2 will be "MainMenu -
Sub menu 2.cdp". See the picture below:
- You can open the project files for the sub menus as usual (for example via File - Open Project) and add buttons, and make other changes, that are specific for each sub menu.
More information
In the tip above we used a simple standard theme for the menu
interface. You probably want to user another design for your menu
and we recommend you to first use the Template Gallery (can be chosen
via File - New Project - New Project Via Template)
to choose a basic design for your menu. Thereafter you can fine-tune
your design. And then you can run the wizard above. All sub
sub menus will automatically have the same design (colors, fonts
etc.) as the main menu.
Copyright © by SamLogic. All rights reserved.