Tip: How to create multiple menus on a CD or DVD (Three levels of menus) |
Part 2 (2) |
Below we will show how to create the CD-Menu Creator project files. We will create one main menu and two sub menus at level two
and two sub menus at level three.
![]()
Now create the sub menus at level 2
Two sub menus need to be created at level 2. Follow the
steps below:
- Open CD-Menu Creator. Create an empty CD project.
Creation of level 2 - sub menu 1:
- Uncheck the checkbox Support for Windows AutoRun (create AUTORUN.INF).
- Click on the Title tab.
- Enter the text "Level 2 - Menu 1" in the Text text box (in the Title tab).
- Click on the Buttons (text) tab.
- Add a button by clicking the Add Button button.
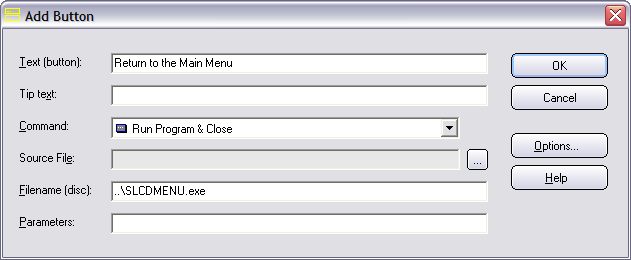
- Write the following button description at Text (button): "Return to Main Menu".
- Choose the Run Program & Close command for this button.
- Enter the text "..\SLCDMENU.EXE" in the Filename (disc) text box.
- The Add Button dialog box should now have this
contents:
- Click OK.
- Create the menu in the folder C:\CDMainMenu\Level2_SubMenu1.

- Save the menu with the filename Level2_SubMenu1.cdp.
- You can preview the menu by clicking on the Preview button
in the editor. The menu window should look like:

This menu contains only one button. When the user clicks on the button, the main menu is opened.
Creation of level 2 - sub menu 2:
- We will now create the next sub menu at level 2. Start by creating an empty CD project.
- Uncheck the checkbox Support for Windows AutoRun (create AUTORUN.INF).
- Click on the Title tab.
- Enter the text "Level 2 - Menu 2" in the Text text box (in the Title tab).
- Click on the Buttons (text) tab.
- Add a button by clicking the Add Button button.
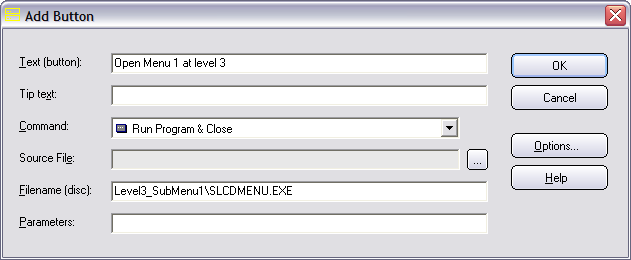
- Write the following button description at Text (button): "Open Menu 1 at level 3".
- Choose the Run Program & Close command for this button.
- Enter the text "Level3_SubMenu1\SLCDMENU.EXE" in the
Filename (disc) text box.
- Click OK.
- Add another button by clicking the Add Button button.
- Write the following button description at Text (button): "Open Menu 2 at level 3".
- Choose the Run Program & Close command for this button.
- Enter the text "Level3_SubMenu2\SLCDMENU.EXE" in the
Filename (disc) text box.

- Click OK.
- Now we need to add a button that opens the main menu. Repeat the steps 6-11 above for this project.
- Create the menu in the folder C:\CDMainMenu\Level2_SubMenu2.
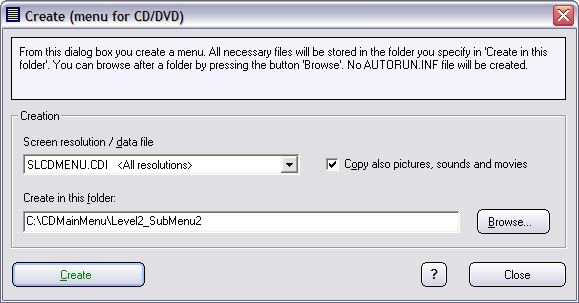
- Save the menu with the filename Level2_SubMenu2.cdp.
- You can preview the menu by clicking on the Preview button
in the editor. The menu window should look like:
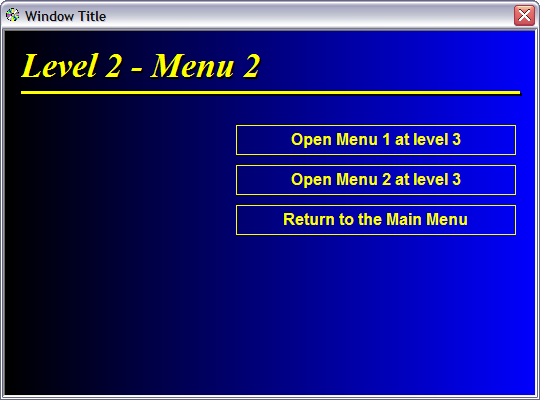
This menu contains three buttons. The topmost and middle button opens sub menu 1 and sub menu 2 at level 3. The bottommost button opens the main menu.
![]()
Now create the sub menus at level 3
We also need to create two sub menus at level 3. Follow
the steps below:
Creation of level 3 sub
menu 1:
- Create an empty CD project.
- Uncheck the checkbox Support for Windows AutoRun (create AUTORUN.INF).
- Click on the Title tab.
- Enter the text "Level 3 - Menu 1" in the Text text box (in the Title tab).
- Click on the Buttons (text) tab.
- Add a button by clicking the Add Button button.
- Write the following button description at Text (button): "Return to Previous Menu".
- Choose the Run Program & Close command for this button.
- Enter the text "..\SLCDMENU.EXE" in the Filename (disc)
text box.

- Click OK.
- Create the menu in the folder C:\CDMainMenu\Level2_SubMenu2\Level3_SubMenu1.
- Save the menu with the filename Level3_SubMenu1.cdp.
- You can preview the menu by clicking on the Preview button
in the editor. The menu window should look like:
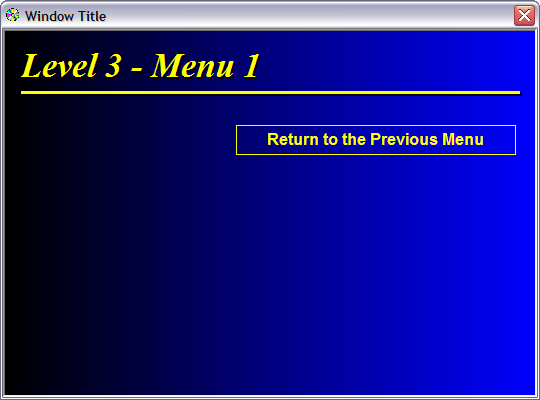
This menu contains one button. When the user clicks on the button, the previous menu (menu 2 at level 2) is opened.
Creation of level 3 sub menu 2:
- We will now create the next sub menu at level 3. Start by creating an empty CD project.
- Uncheck the checkbox Support for Windows AutoRun (create AUTORUN.INF).
- Click on the Title tab.
- Enter the text "Level 3 - Menu 2" in the Text text box (in the Title tab).
- Click on the Buttons (text) tab.
- Add a button by clicking the Add Button button.
- Write the following button description at Text (button): "Return to Previous Menu".
- Choose the Run Program & Close command for this button.
- Enter the text "..\SLCDMENU.EXE" in the Filename (disc)
text box.
- Click OK.
- Create the menu in the folder C:\CDMainMenu\Level2_SubMenu2\Level3_SubMenu2.
- Save the menu with the filename Level3_SubMenu2.cdp.
- You can preview the menu by clicking on the Preview button
in the editor. The menu window should look like:

This menu contains one button. When the user clicks on the button, the previous menu (menu 2 at level 2) is opened.
![]()
Now we will create the main menu
Now it is time to create the main menu. We will put two
buttons on the main menu. Button 1 will open menu 1 at level 2 and
button 2 will open menu 2 at level 2. Follow the steps below to
create the main menu:
- Create an empty CD project.
- Click on the Title tab.
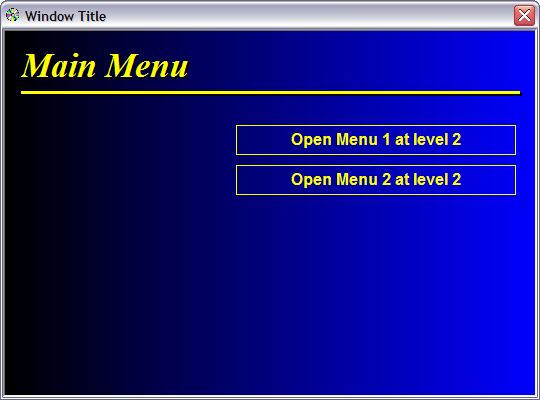
- Enter the text "Main Menu" in the Text text box (in the Title tab).
- Click on the Buttons (text) tab.
- Add a button by clicking the Add Button button.
- Write the following button description at Text (button): "Open Menu 1 at level 2".
- Choose the Run Program & Close command for this button.
- Enter the text "Level2_SubMenu1\SLCDMENU.EXE" in the
Filename (disc) text box.

- Click OK.
- Add another button by clicking the Add Button button.
- Write the following button description at Text (button): "Open Menu 2 at level 2".
- Choose the Run Program & Close command for this button.
- Enter the text "Level2_SubMenu2\SLCDMENU.EXE" in the
Filename (disc) text box.

- Click OK.
- Create the menu in the folder C:\CDMainMenu.
- Save the menu with the filename MainMenu.cdp.
![]()
You can now test that the menu system is working by starting
SLCDMENU.exe program file in the
C:\CDMainMenu folder. The main
menu will be initially shown. It should look like this:
You can click on the buttons in the menus to see how you can
navigate between the created menu interfaces.
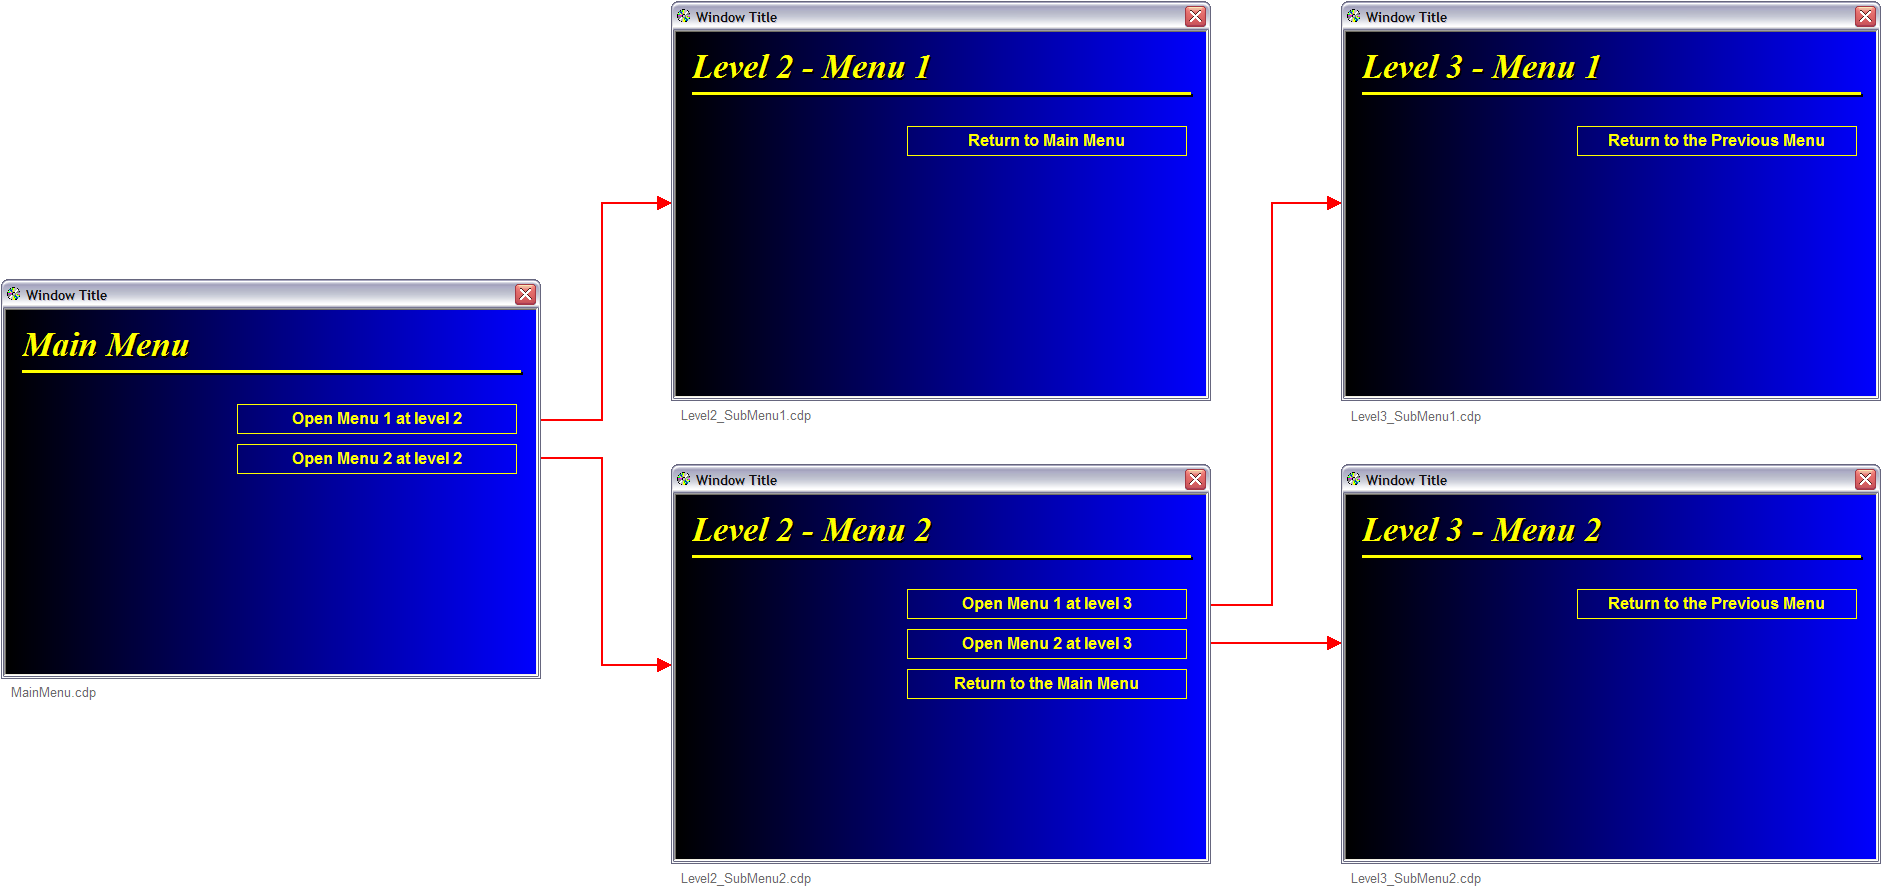
How the menus are linked together
The figure below shows how the 5 menus, that we created, are linked together.
You can magnify the picture if you want to take a closer look by clicking on
the picture.
Download the project files
You can download all project files that were created in the
tip above from
this download page. You can also download a fully functioning menu system
(same as the tip above) from the same download page.
Copyright © by SamLogic. All rights reserved.