 The Visual Installer
installation tool can be used to create an installation package
for a Visual C# application. Visual
Installer can import a Visual C# project file (a .CSPROJ
file) or a Visual Basic solution file (a .SLN file) and create an installer for it. All versions of
Visual C# since 2005 (including the latest 2019) are
supported. The Visual Installer
installation tool can be used to create an installation package
for a Visual C# application. Visual
Installer can import a Visual C# project file (a .CSPROJ
file) or a Visual Basic solution file (a .SLN file) and create an installer for it. All versions of
Visual C# since 2005 (including the latest 2019) are
supported.
In the tip below we will show how to import a Visual C# project
file to Visual Installer by using Visual
Installer's import wizard.
|
To create a
self-extracting setup file: |
1. Start Visual Installer and create a new project.
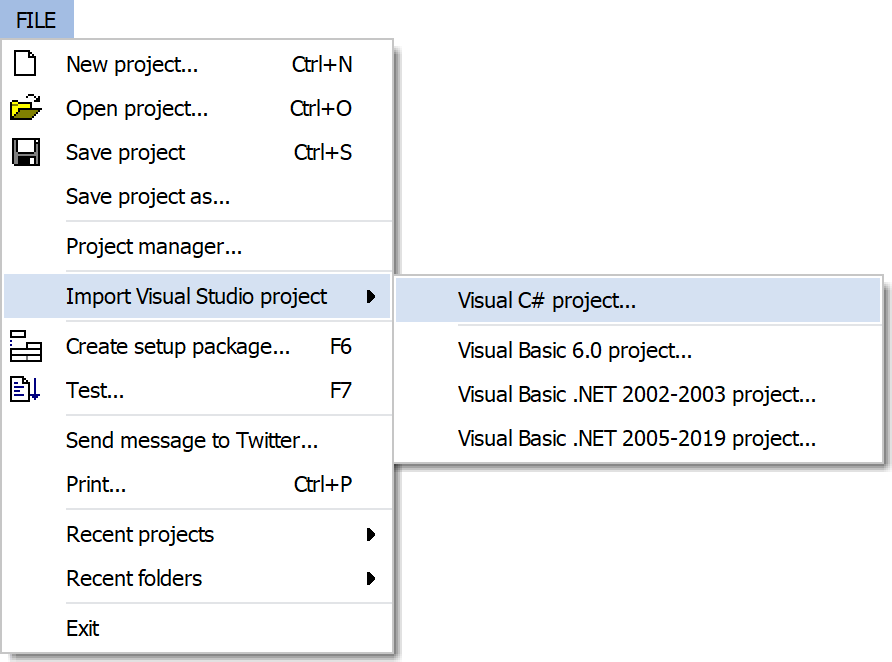
2. Select
the File - Import Visual Studio project - Visual C# project menu item:
3. The
following dialog box is now shown:
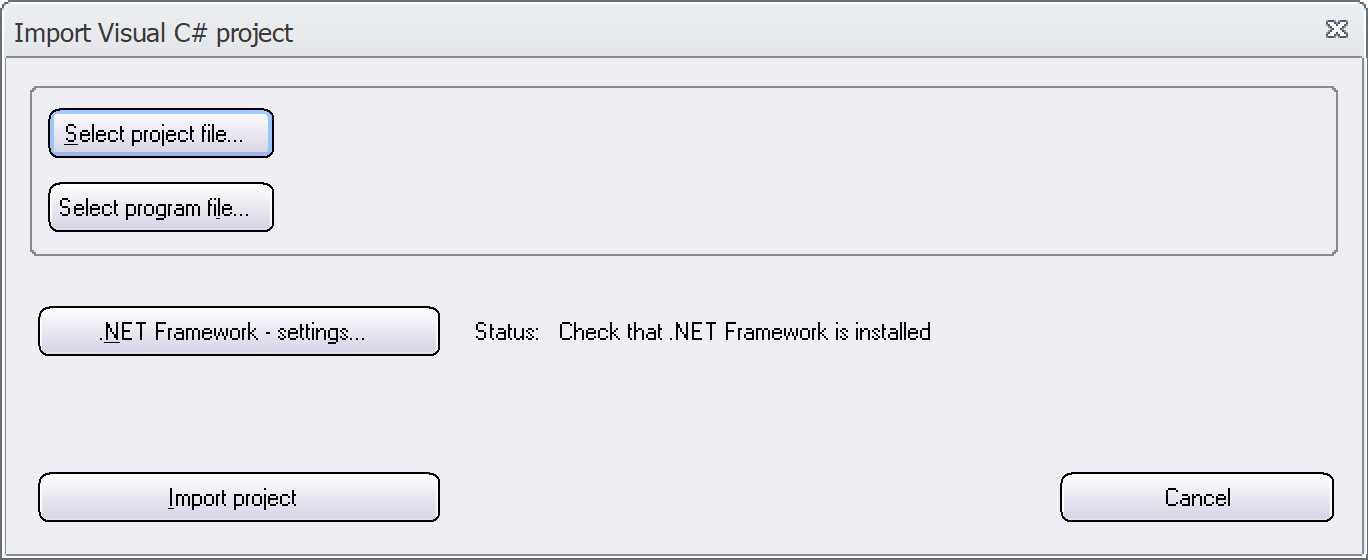
4. Click the Select project file button and browse
for a Visual C# project file (.CSPROJ).
You can also choose a solution file (.SLN) if your
application uses many project files.
5. Click the Select program file button and browse
for the program file (.EXE) of the project. This is the
executable file a user starts to run your application.
6. If your C# application requires a minimum version
of .NET Framework you can click on the .NET Framework -
setting button. The following dialog box will now be shown:
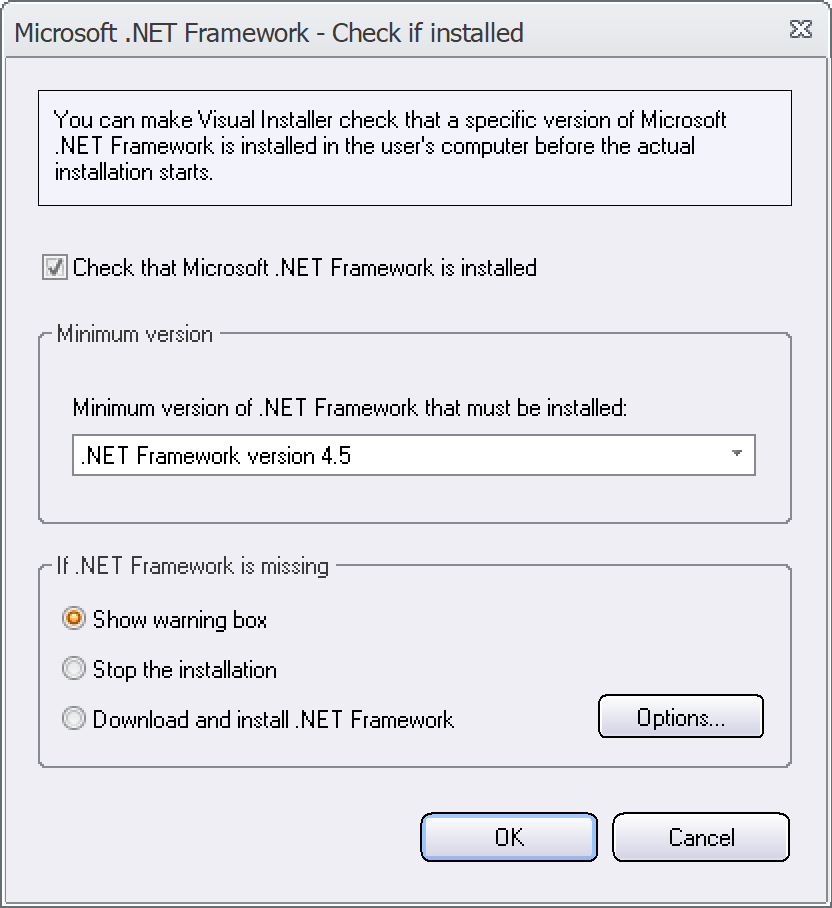
7. In the dialog box, select the minimum .NET version for
your application; for example the .NET
Framework version 4.5 option.
8. You can choose if you want to warn the user, stop the
installation or let the user download the missing version of
.NET Framework. Choose the proper option in the If .NET
Framework is missing group box.
9. Click OK to close the dialog box.
10. Now click on the Import project button in the
Import Visual C# project dialog box.
11.
In the dialog box that appears, choose a main destination folder
for your application. You can usually use the default folder
that is suggested in the dialog box, so you should only click
OK.
12.
Enter a description for the shortcut for your application, in
the new dialog box that is shown.
13. Press OK to continue.
14. The file list in Visual Installer will now be filled
with all files that your application consists of. If it is a
small project there will probably only be one EXE file in the
file list:
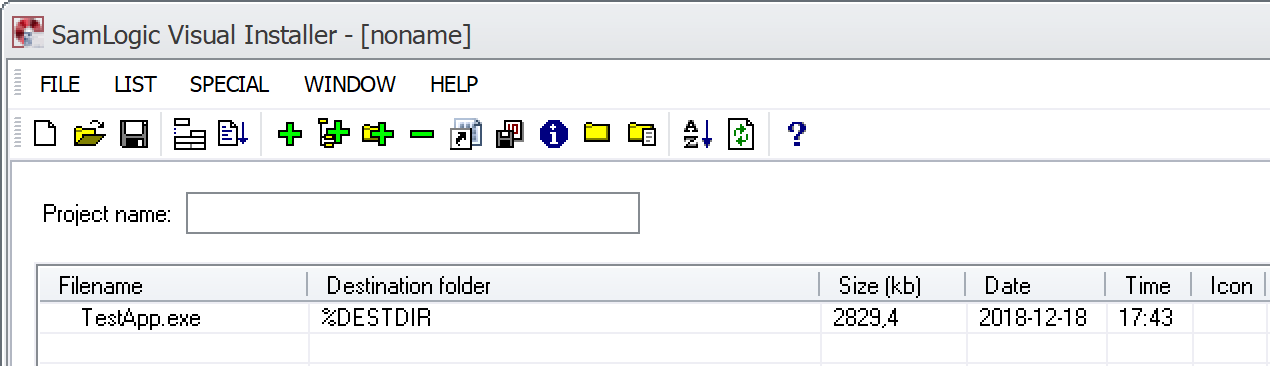
15. Give your project a name by entering a project name
in the Project name text field.
For example "My Test Project".
16. Specify a main destination folder in the Main
folder text field.
For example "%PROGRAMFILES\MyTestApp".
17. Now create a setup package by choosing the File -
Create setup package menu item.
You have now created an installation package that installs a
Visual C# application. The setup program checks first that the
required .NET version is installed in the computer, and if the
system requirements are met, the application will be installed.
|


