If
you want to change the text alignment of a cell, column or row
in a table after the table is
created, it is
possible. The tips below show how to change text alignment for a
cell in a table:
|
To change text alignment
for a cell in a table: |
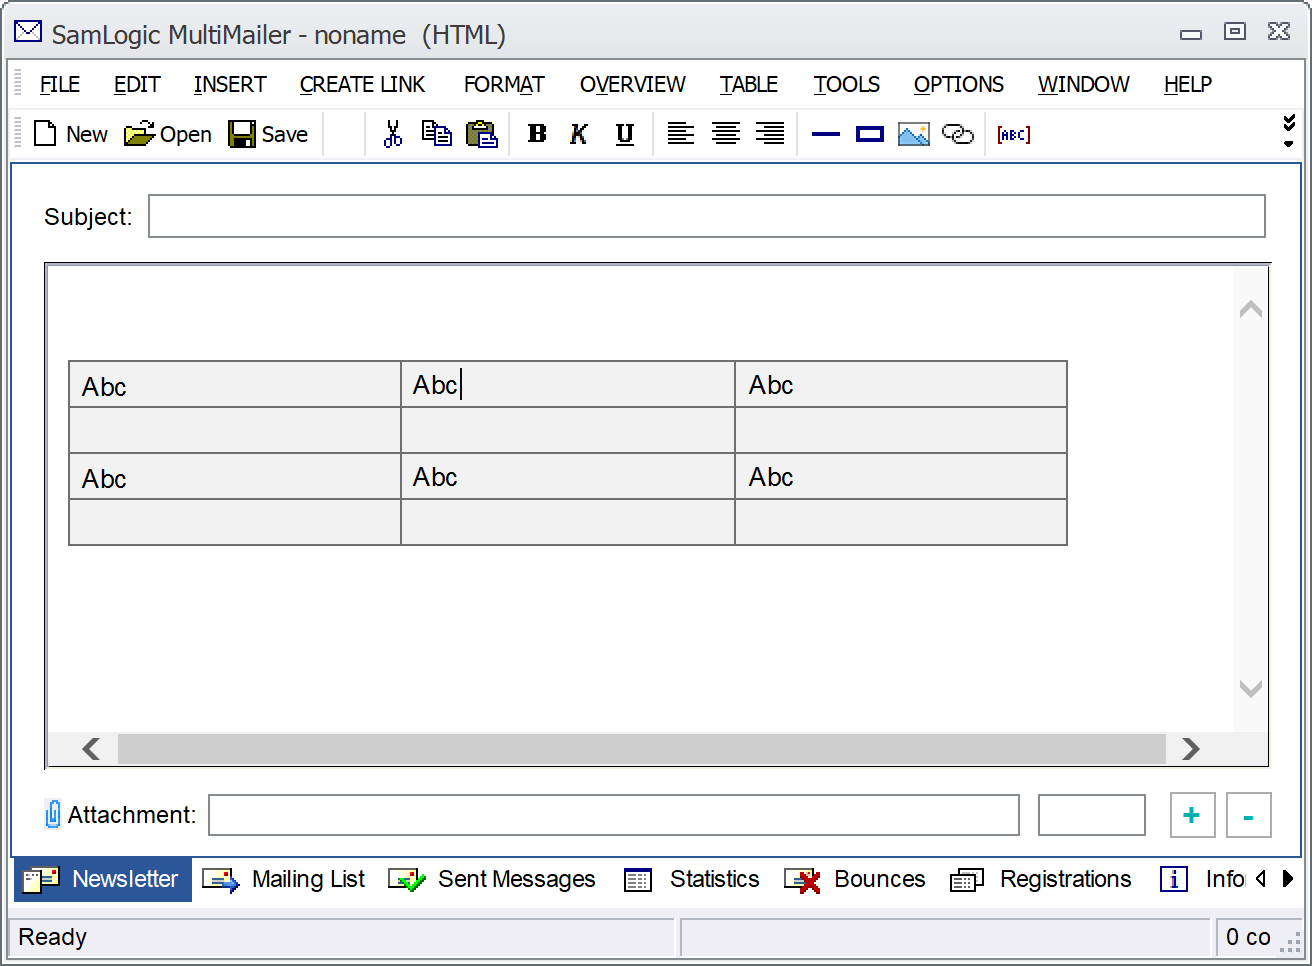
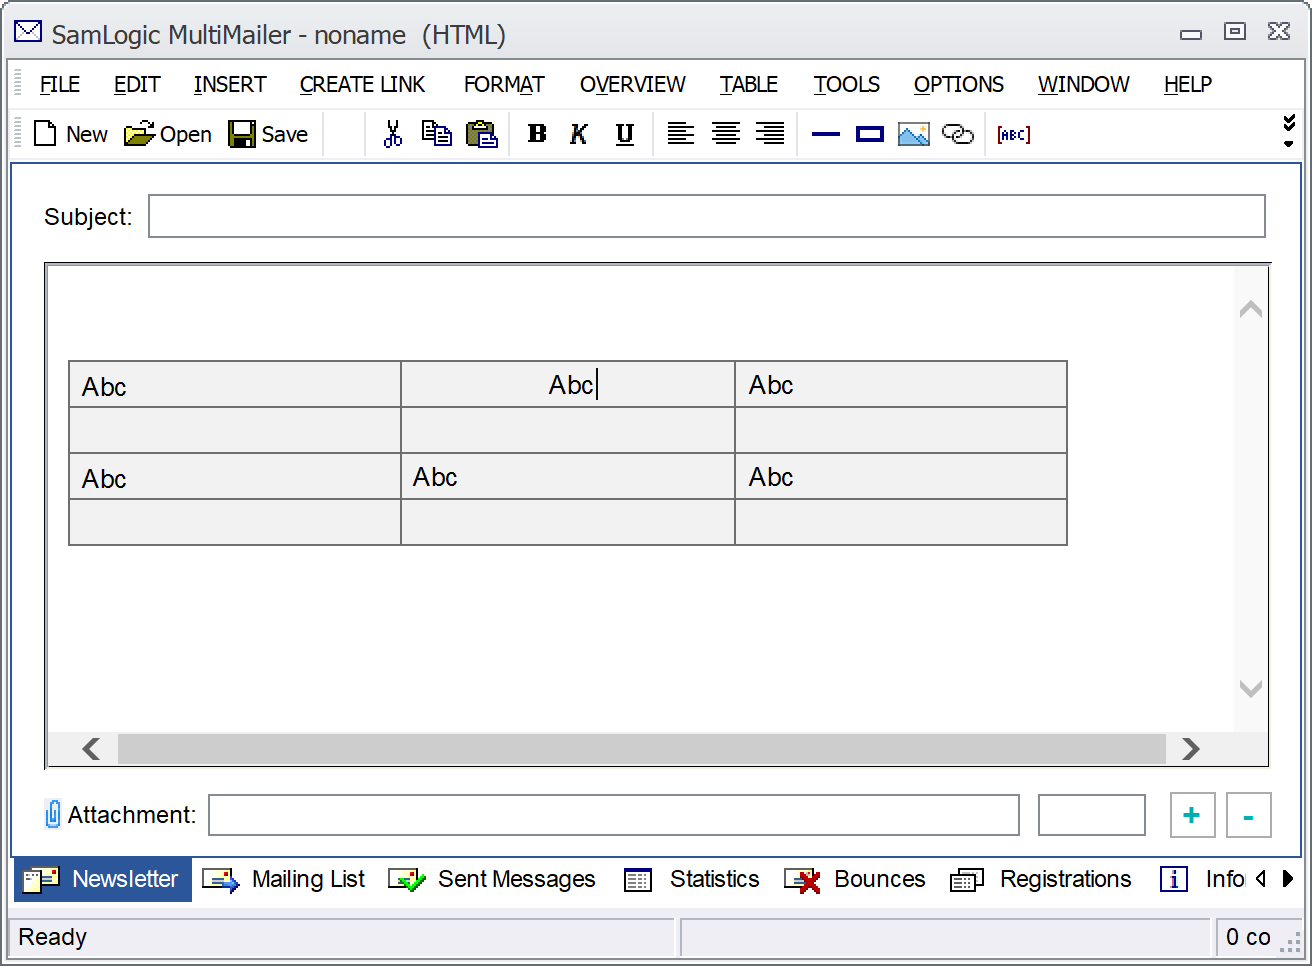
1. Click in the cell for which you want to change text
alignment. The text cursor should blink in the cell of the
table.
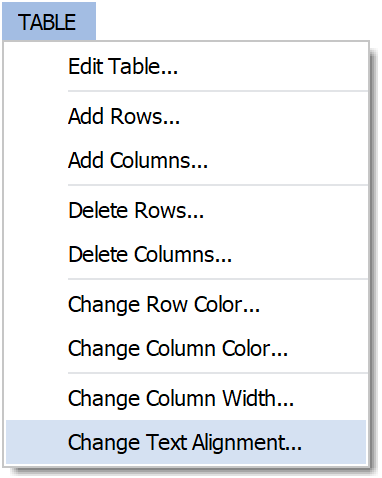
2. A new menu called TABLE should now appear in
MultiMailer's menu bar (at the top, between OVERVIEW and
TOOLS). In this menu, select the menu option Change
Text Alignment (see image below):
3. The following dialog box should now appear:
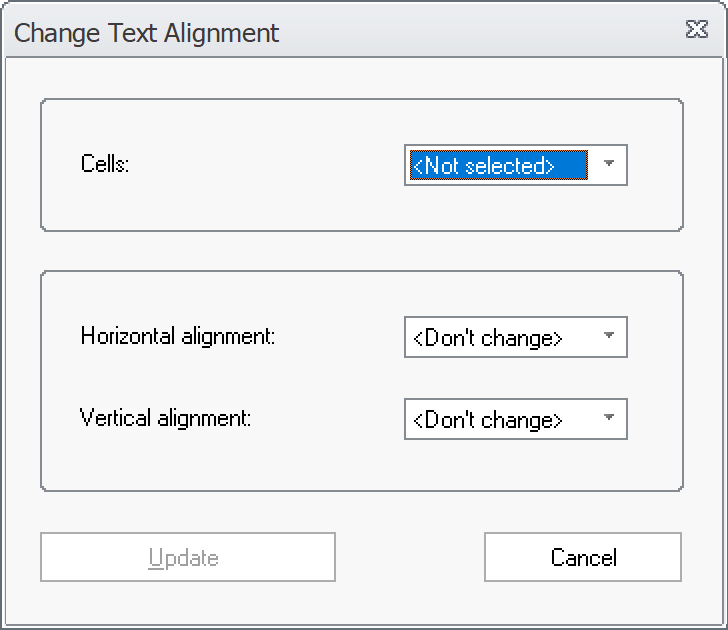
4. In the Cells combobox, select the This cell
option.
5. In the Horizontal alignment combobox, select
the text alignment you want, for example Center.
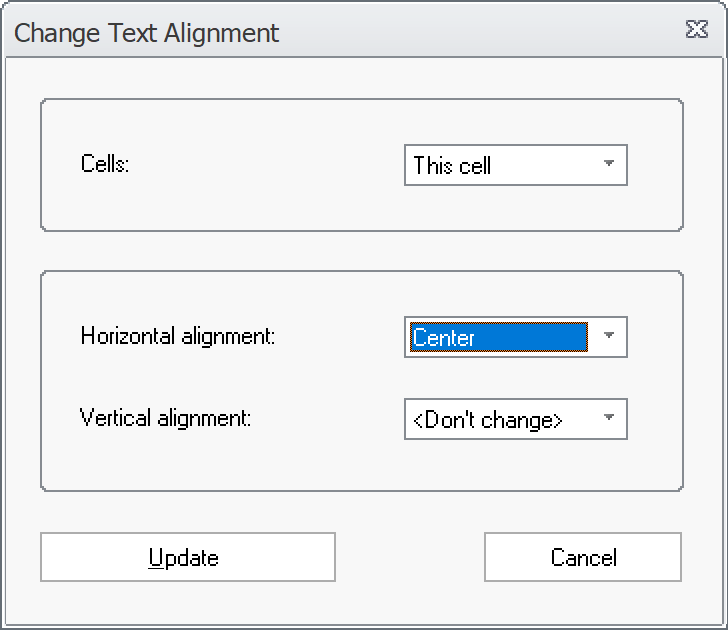
6. Click the Update button in the dialog box to
update the table cell with the new text alignment. The image
below shows how it might look after a change (compare with the
image at point 1):
If you want to change the text alignment for an entire column,
at point 4, select the This column option instead. If you
want to change the text alignment for a line, select the This
row option.
| Note that the TABLE
menu only appears if the text cursor is inside a table
created with MultiMailer. If the table was created with
another tool or if the text cursor is outside the table,
then the TABLE menu is not displayed. The
TABLE menu is used to edit properties of an existing
table. |
 How
to change the width of a column in a table How
to change the width of a column in a table
|


