In
MultiMailer, you can
insert and edit tables with any number of rows and columns. You
can also specify colors, width and other properties for the
tables. In the tips below, we show you how to insert a table
into a newsletter/document in MultiMailer.
A tip showing how to edit an existing table can be found on this
tip page.
|
To insert a table in
MultiMailer: |
1. Start MultiMailer.
2. Create a new newsletter or open an existing one.
3. Place the text cursor where you want the table in the
newsletter.
4. Select the Table menu item from the Insert
menu. The dialog box below should now appear:
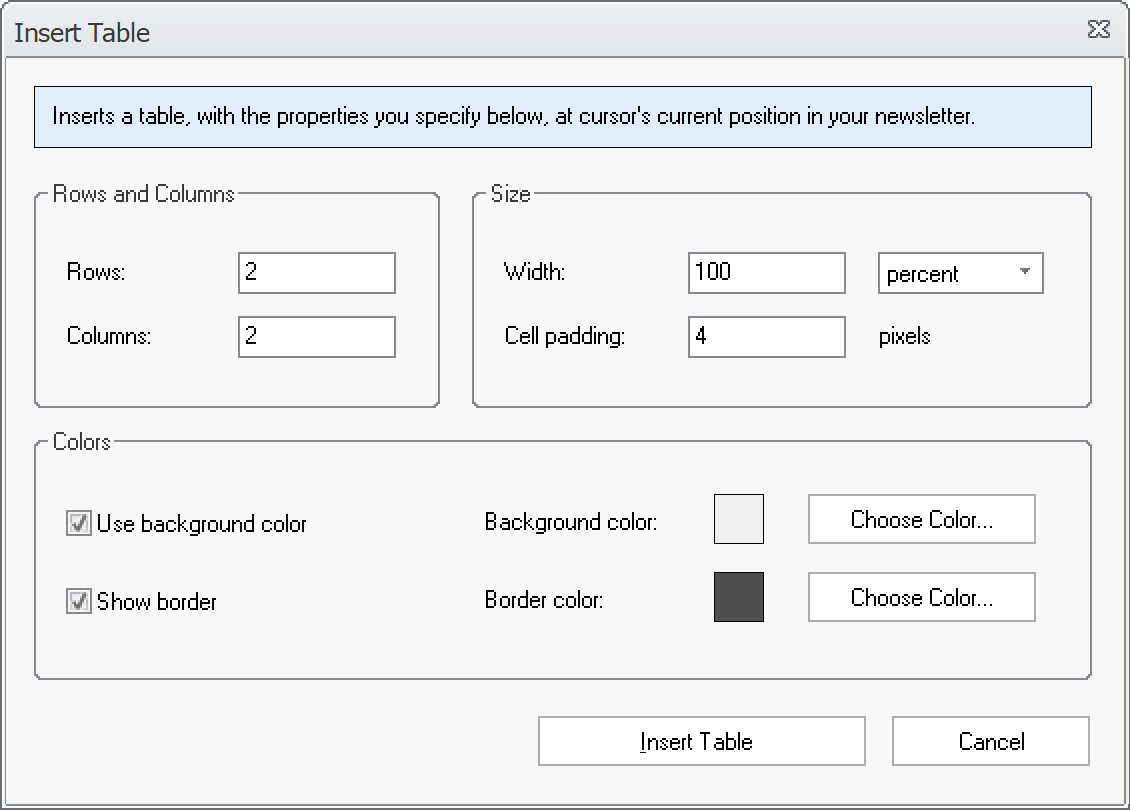
5. Now enter the number of rows and columns, as well as
other properties, for the table you want to insert.
6. Click the Insert Table button.
7. Now a table should be created at the position of the
cursor in the document. Example:
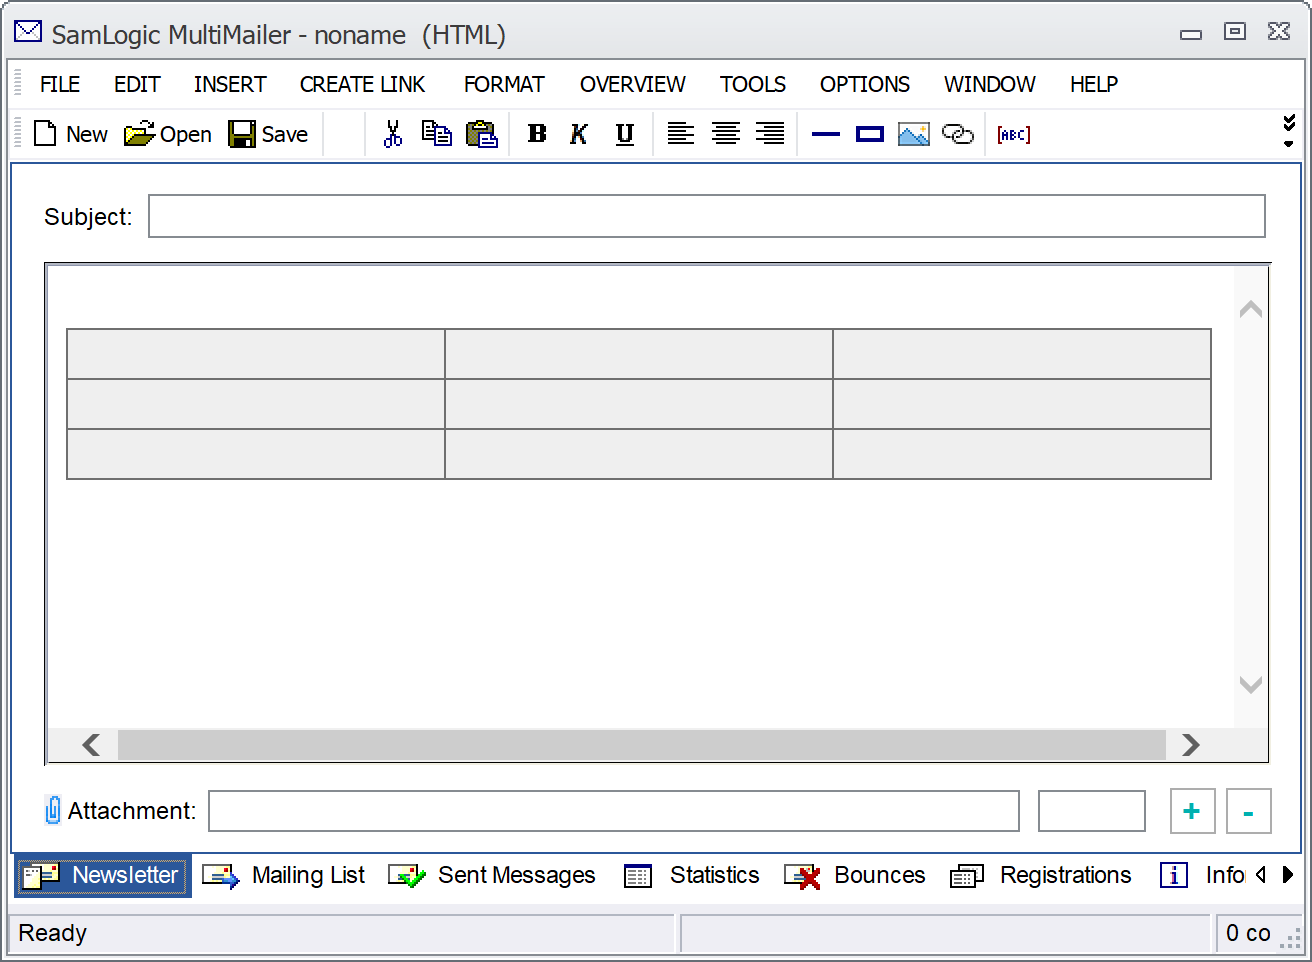
The table above contains 3 rows and 3 columns. The background
color is light gray and the frame color is dark gray.
This is how you change a table's properties afterwards
If you want to
change a table's properties afterwards, for example change the
number of rows or columns, or change colors, it is easy to do
so. In the following tips, we'll show you how to change a
table's properties after it's been created:
 How
to edit a table in MultiMailer How
to edit a table in MultiMailer
How
to change width for a column in a table
How
to change text alignment for a cell in a table
|


