Tip - Setup Dialog
Boxes:
How to choose, add text & change
image

Unless you have not chosen to create a
silent
installation, the setup dialog boxes (the setup wizard) is a
very important part of an installation. Via the setup dialog
boxes you can give the user important information about the
installation and let the user choose for example an installation
folder, drive, program group, or ask for a license key or
password. The setup dialog boxes are also a good opportunity to
give your user a great first impression of your product, so it
can be a good idea to make them look as professional as
possible.
In this tip we will show you how to choose which setup dialog
boxes to include in a Visual Installer installation, how to add
text to the dialog boxes and how to change image for the setup
dialog boxes.
|
How to choose which
setup dialog boxes to include in an installation: |
It is easy to choose which setup
dialog boxes to include in an installation. After you have
created a new project (or opened an existing project) you have
to open the Dialog boxes tab in the editor and select the
setup dialog boxes that you want to include in the installation:
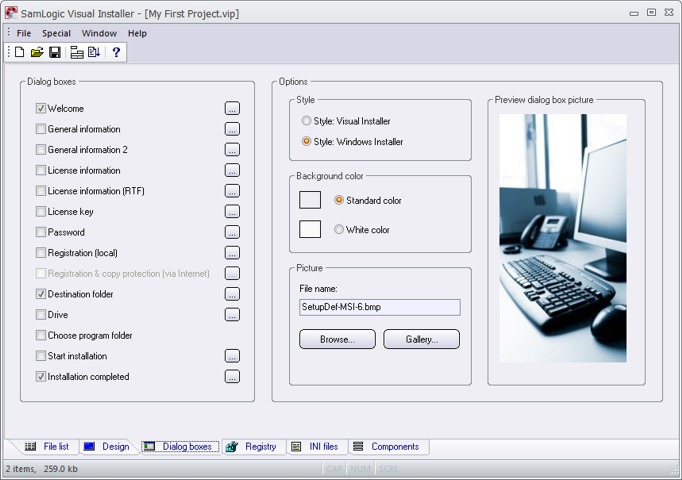
You can select a setup dialog box by checking the option box to
the left of the name of the setup dialog box, inside the
Dialog boxes frame. If you for example want to include the
Destination folder dialog box in your installation, you
must check the Destination folder option:

|
How to add text to a
setup dialog box: |
After you have chosen which setup
dialog boxes to include in an installation, you can add text to
the dialog boxes. If you for example want to add text to the
Welcome dialog box, you can click on the "..." button
to the right of the Welcome option in the Dialog boxes
frame. The following dialog box will then be opened:
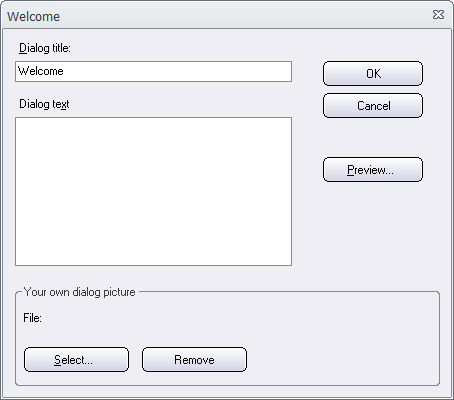
Here you can enter a dialog title and a dialog text. For example
like this:

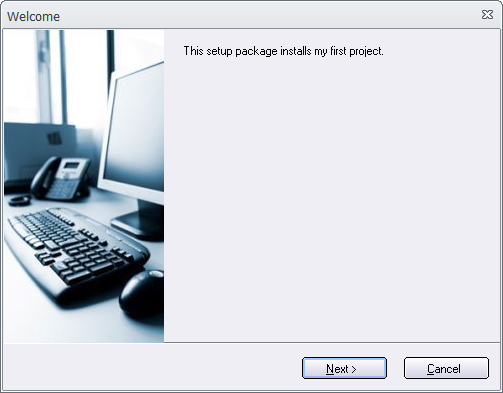
If you want to preview the setup dialog box, click the Preview button
in the dialog box. The Welcome setup dialog box will look
like this:
Some texts in the dialog boxes are standard texts (for example
button texts) and can not be changed in this way. Instead you
need to make your changes in special languages files that
follows Visual Installer. Via these languages files you can also
adapt Visual Installer to different languages. You can read
this tip to get more information.
|
How to change image for
the setup dialog boxes: |
You can
also change the image that is shown in the setup dialog boxes.
We have included many ready-to-use images (see
this video on YouTube for some examples) and it is easy to
choose one of them via Visual Installer's editor. If you click on the Gallery button in
the Picture frame in the Dialog boxes tab, the
following dialog box is shown:
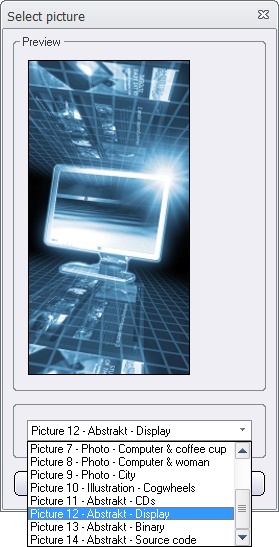
Via this dialog box you can choose one of the built-in images
for your setup dialog boxes. The image that you choose will be
visible in the Dialog boxes tab, in the picture window to
the right. In this way you can easily see which dialog box
picture is chosen for a specific project:
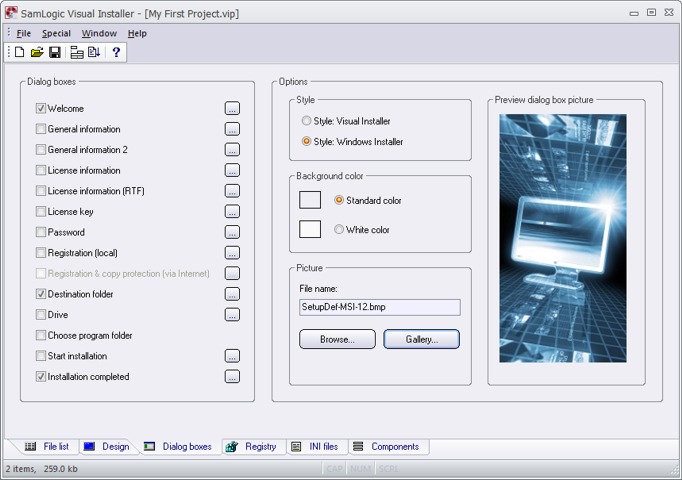
If you prefer to use your own picture, for example your logo,
you can click on the Browse button in the Picture
frame in the Dialog boxes tab instead, and choose a
picture file on your hard disk.
|
See also
 Tip:
How to add a link to a setup dialog box Tip:
How to add a link to a setup dialog box
Tip:
Create installations in different languages
< Tips Index Page
|
 |
Visual
Installer Tip |
|
|


