 It
is possible to use a Google server for the email
delivery when using MultiMailer. If you have a Gmail account or a
Google Workspace account, you can have MultiMailer to interact
with these accounts and send out emails with your Google
account's email address as the sender. A Google server is used
as the sending server. It
is possible to use a Google server for the email
delivery when using MultiMailer. If you have a Gmail account or a
Google Workspace account, you can have MultiMailer to interact
with these accounts and send out emails with your Google
account's email address as the sender. A Google server is used
as the sending server.
There is a limit on how many emails you can send out per day in
this way. The limit depends on the type of Google account. But
for smaller quantities of emails, this server solution works
great. However, if you want to send out larger quantities of
emails, another server is required; e.g. MultiMailer's built-in
server.
|
To connect MultiMailer
with a Google server: |
|
Part 1 - Enable Two-Step
Verification |
To use a Google account for sending, you must first enable
two-step verification for your Google account, if you
haven't already. Here's how to enable two-step verification:
1.
Open your Google account. For example, by:
a) go directly to your account:
https://myaccount.google.com/
b) open your Gmail/Workspace account, then click
on the Google apps icon and then on Account
2.
Click on the Security & sign-in option in the left part
of the web window.
3.
Click on the 2-Step Verification option and follow the
instructions that appear. More information on how to enable
two-step verification is available on Google's web site:
https://support.google.com/accounts/answer/185839?hl=en.
|
Part 2 - Create an
application password |
Now we will create an application password (app password) via the Google
account. The application password will then be used in
MultiMailer. Follow the instructions below to create such a
password:
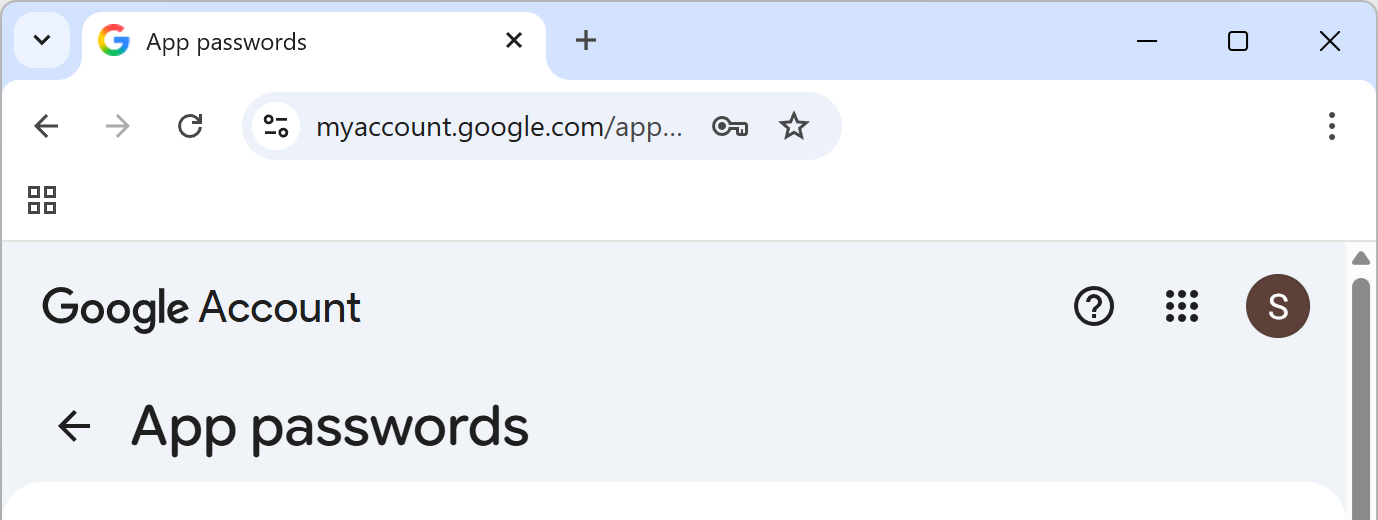
1.
Open this page at Google:
https://myaccount.google.com/apppasswords.
2.
A page titled App Passwords on the Google website should appear.
The top of the page looks like this:
3.
Enter the text "MultiMailer" in the gray App name input
field located in the middle of the web page:
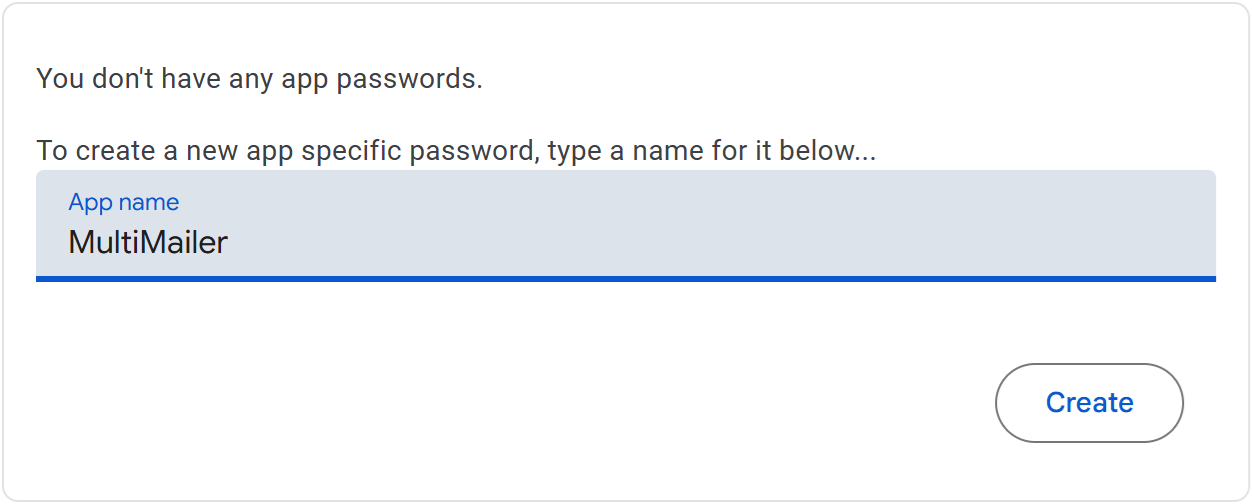
4.
Now click the Create button. A password should now be
generated and displayed in a window:
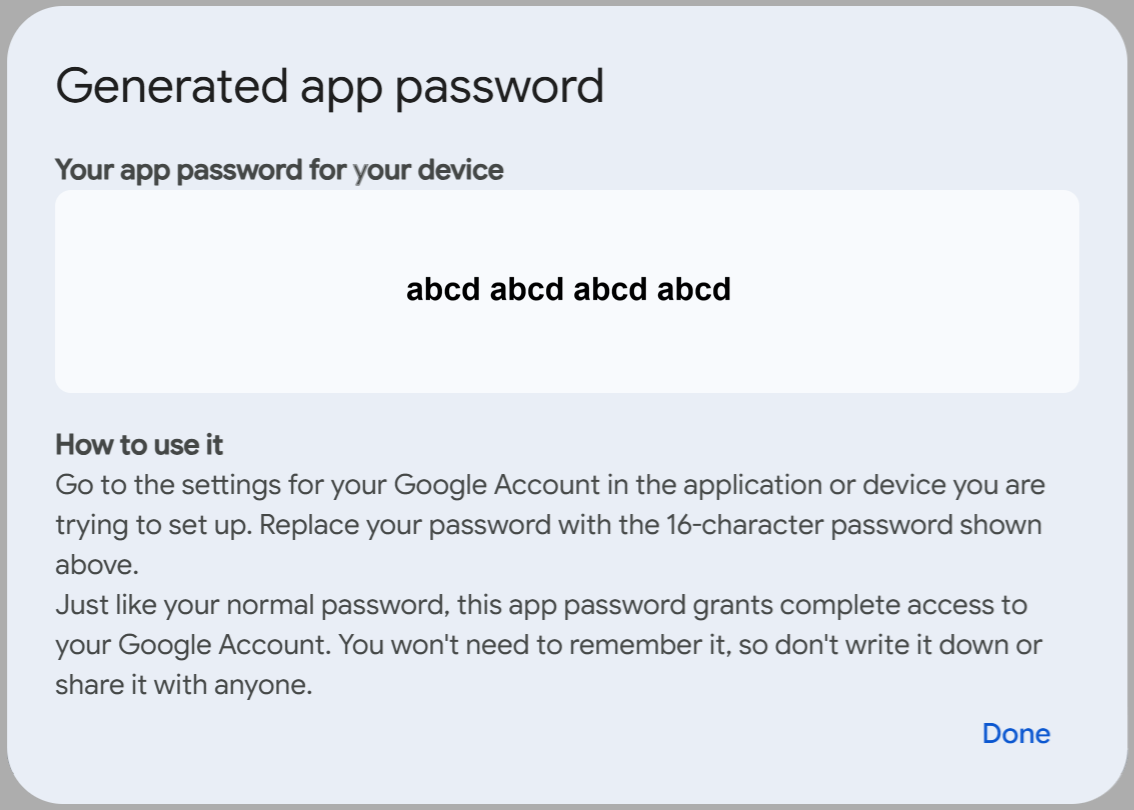
5.
Copy the password to the clipboard and paste it into for example
Notepad. We will use it in MultiMailer shortly.
6.
Click Done when you are finished.
|
Part 3 -
Set up MultiMailer |
Now we will set up MultiMailer to use Google's
email server.
1.
Start MultiMailer if you have not already done so.
2.
Select the E-mail Account Settings menu item in
the Options menu in MultiMailer.
3.
The Choose E-mail Server dialog box will now appear.
4.
Select the "Use e-mail server from my ISP or company"
option there:
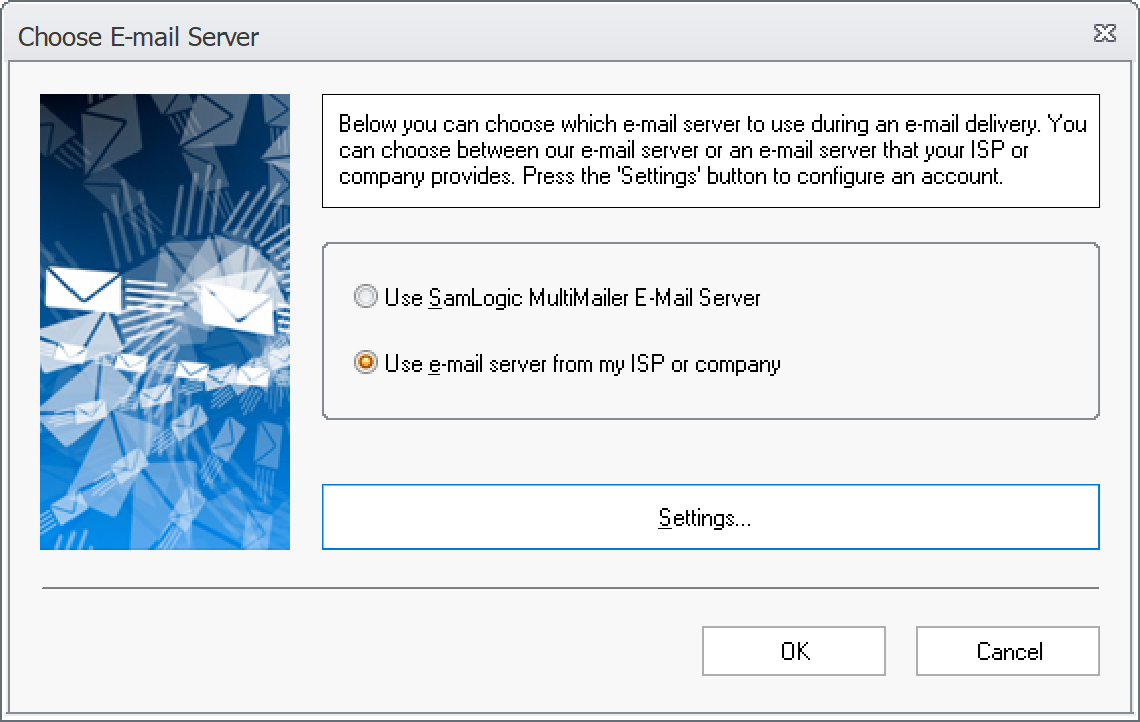
5.
Thereafter, click on the large Settings button.
6.
The E-Mail Account Settings dialog box will now appear:
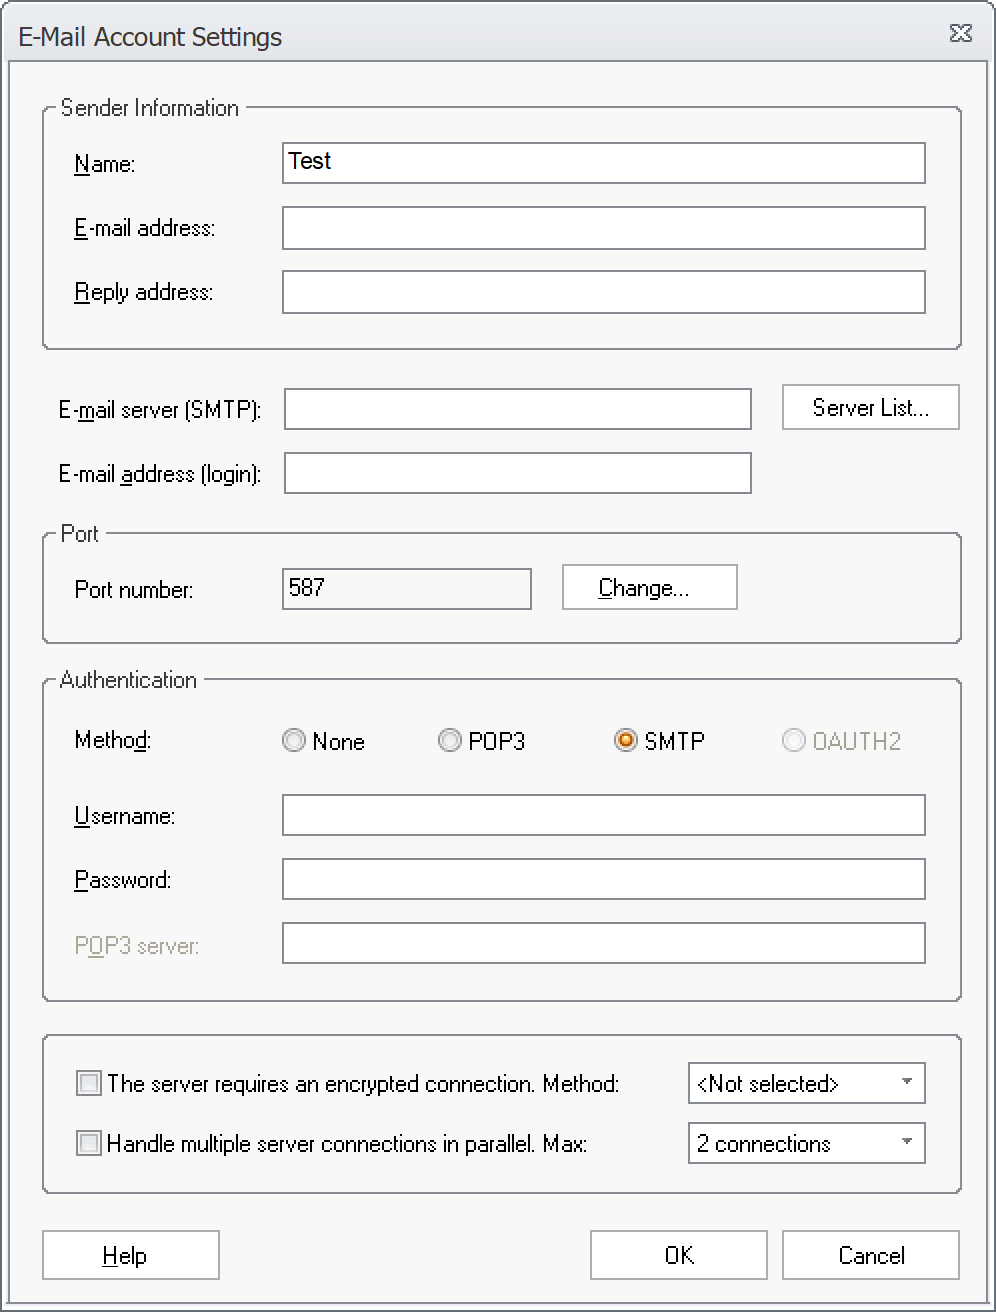
7.
Click on the Server list button in this dialog box. The
button is located to the right in the upper half part of the dialog
box.
8.
The E-Mail Server List dialog box will now appear.
9.
Select the "Google: smtp.gmail.com (port 587)"
option in the
list that is shown:
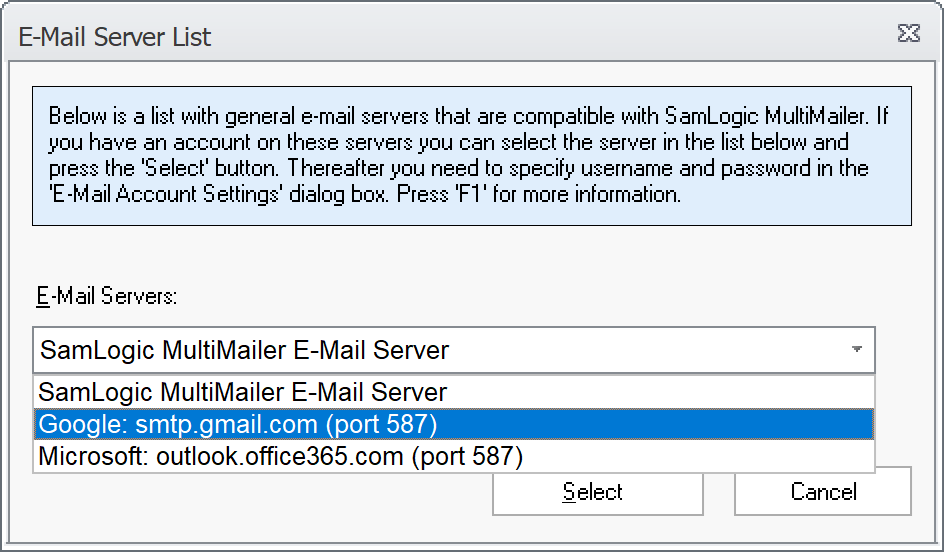
10.
Click the Select button to confirm your selection and close
the dialog box.
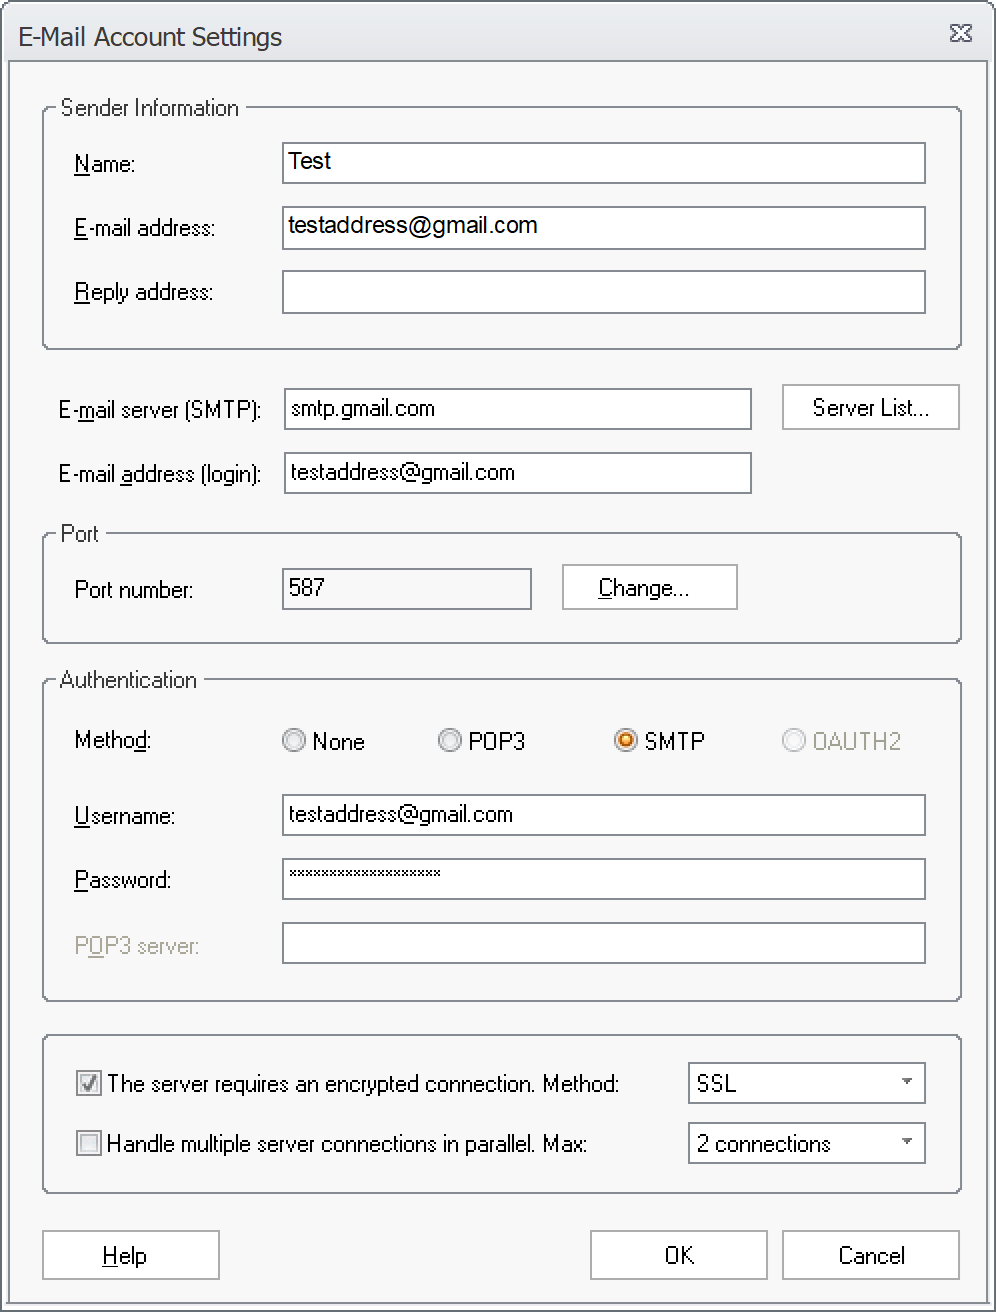
11.
The E-Mail Account Settings dialog box will now appear again.
12.
In the E-mail server (SMTP) field of this dialog box, the domain
name of the selected Google server (smtp.gmail.com) should be
displayed.
13.
In the E-mail address and E-mail address (login)
input fields, enter your Google
account's email address.
14.
Leave the Reply address field blank.
15.
In the Username field, enter the same email address that you entered in
step 13 above.
16.
In the Password field, paste the application password
(app password) that you obtained
in Part 2 above.
17.
Once you have pasted the password, you can close Notepad or the
program you used to temporarily save the password. We do not
need the password anymore.
18.
Click OK to close the dialog box.
19.
Click OK again.
Your MultiMailer is now configured to send emails via a Google
account and a Google server. Send a test email and check that
it works. The sender address of the email message will be the email address you
entered in point 13 above.
How are email bounces handled?
If email bounces are
generated, e.g. because certain recipients's email
addresses not function anymore, they will be sent to the
email address you entered in point 13 above. You can
either handle these manually or let MultiMailer's
automatic bounce handling take care of them. We describe
how to set up the latter on
this tip page. |
 How
to send a newsletter to all contacts How
to send a newsletter to all contacts
|


