|
Getting Started
With Visual Installer (5 of 5) |
 |
Visual
Installer Tip |
|
|
|

| On this page
we will show how to save a project and how to build (compile) a setup
package. |
|
Saving a project and
building a setup package |
Saving a project
|
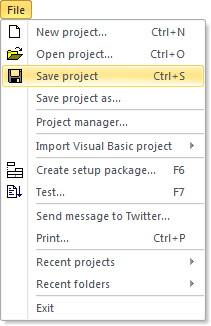
26. |
Now it
is time to save our project. You can save a project by
choosing the Save project menu item in the
File menu: |
|
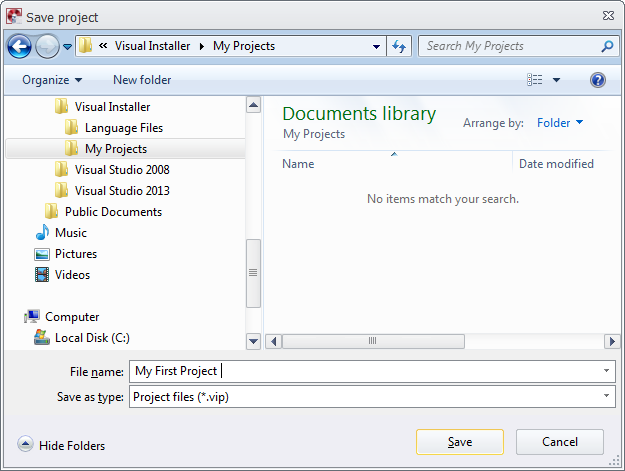
27. |
The
Save project dialog box (as shown in the picture
below) is now opened. Enter a filename in the File
name text box (for example "My First Project") and
click the Save button. |
|
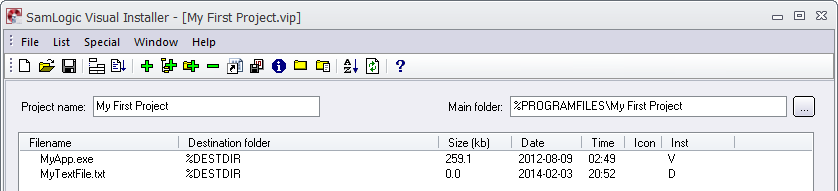
28. |
We have now saved our project. The filename of the
project is displayed in the caption bar at the top of
the editor's window: |
Building
a setup package
|
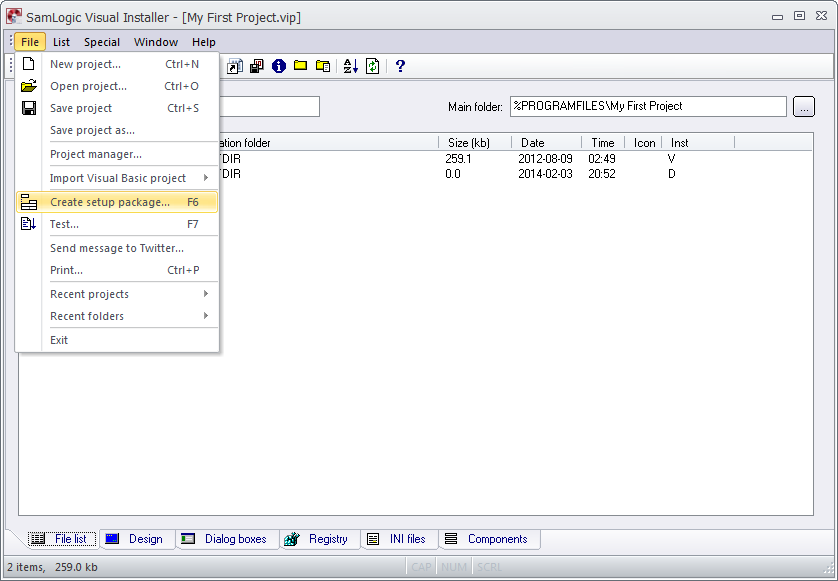
29. |
Now it
is time to build (compile) a setup package. You can do
it by first choosing the File - Create setup package
menu item, as shown in the picture below: |
30. The following dialog box is now shown:
|
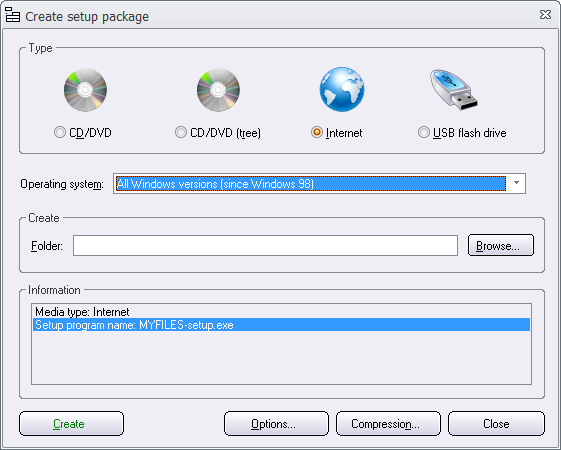
31. |
Via
this dialog box you can create different types of setup
packages. We will create a setup package of Internet
type, which means that a single self-extracting
installation package (a single EXE file) will be
created. This kind of setup package is perfect for
distribution via the Internet, because only one single
EXE file need to be uploaded to the web server. This
option will be preset because we chose the Internet
project type earlier in this step-by-step guide (at step
3). |
|
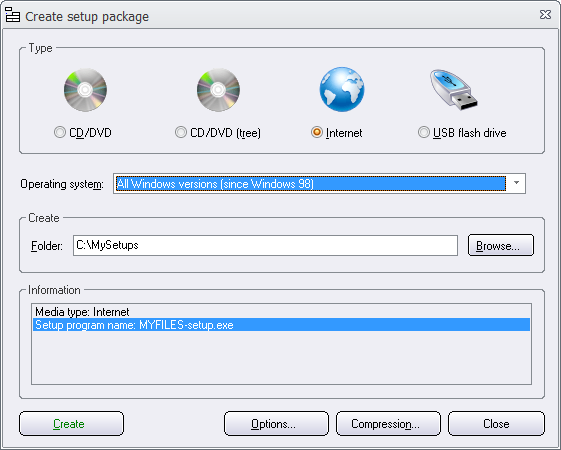
32. |
Before
we can build the setup package we need to specify a
creation folder for the package. You can browse for a
folder by clicking on the Browse button, or you
can enter a path directly in the Folder text box.
You can for example enter the following folder path:
"C:\MySetups" |
|
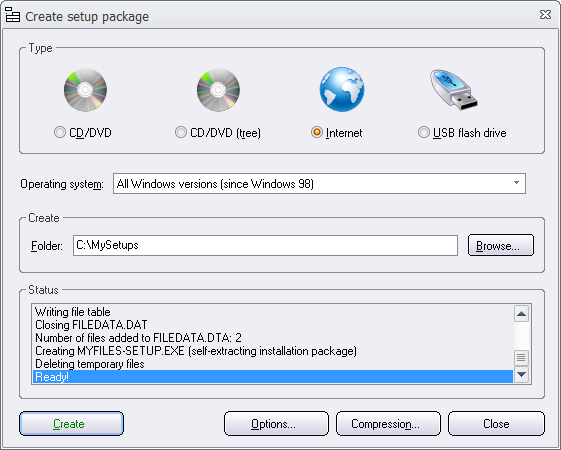
33. |
Now
you can click on the Create button to build a
setup package. The status window will inform you how the
build process proceeds: |
|
34. |
If
there are no errors during the build process, the last
line in the status windows will contain the text "Ready!"
(as shown in the picture above). This means that the
setup package now has been build. You can open the
C:\MySetups folder to view the setup file. The
folder should have the following contents: |

|
35. |
The
filename of the setup package is MYFILES-setup.exe.
This is the default filename and is used if no other
filename is specified. If you want to change filename
for the setup package, you can click on the Options
button in the Create setup package dialog box and
change the filename. You can read more
on this page. |
|
36. |
You
can test that the installation works by double-clicking
on the setup file and run the installation.
If
you want to uninstall the files, you can open
Uninstall a program in the Control panel in
Windows, and double-click on the "My First Project" item.
Then follow the instructions given by the uninstallation
program. You can read more
on this page. |
|
That's all!
We have now showed you how to create a basic installation project
with Visual Installer!
For more tips and information about specific functions, we
recommend you to check our
tips
index page. You can also view our
Visual Installer related
videos on YouTube and read our Visual Installer related
articles on our
website. |
See also
 Tip:
How to add a shortcut to a program file Tip:
How to add a shortcut to a program file
|


