In Visual Installer it is possible to block specific license keys from be accepted during an installation. This is useful when using prime number based license keys because they are created and verified mathematically. So if the license key is evaluated correctly, it will be accepted.
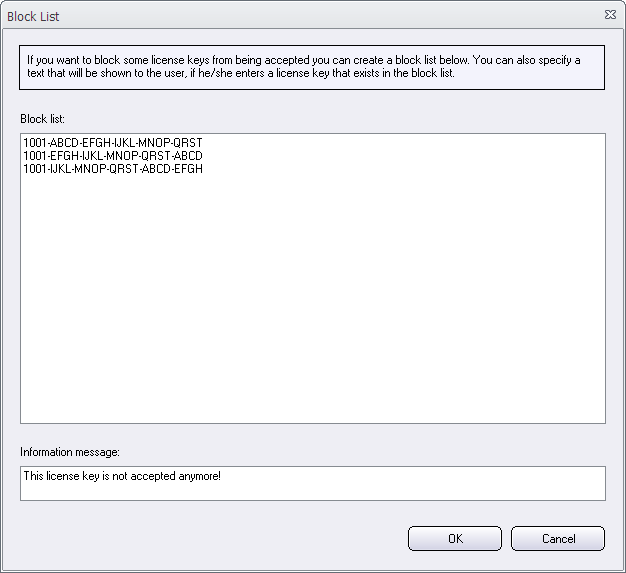
In Visual Installer you can create a block list with prime number based license keys that should not be accepted, although they are mathematically correct. This is done via the Block List dialog box in Visual Installer:

In this dialog box you can enter a list with license keys that should not be accepted by Visual Installer during an installation. The block list is stored per installation project and is saved with the .VIP project file. So it is not a global block list. It only adds the block list to the specific installation project.
Where to find the ‘Block List’ dialog box?
You can open the Block List dialog box by following these steps:
1. Open the Dialog boxes tab in Visual Installer’s editor.
2. Click on the “…” button to the right of the License key option.
3. Click on the More options button.
4. Click on the Block List button.
In the Block List dialog box that is now opened you can enter a list with license keys to block. One license key per row. You can also specify an information message that is shown to the user if he/she enters a blocked license key. If no text is specified, a default text is used.
Note
Both prime number based license keys and static license keys can be blocked with this method, although this function is most useful when used with prime number based license keys.
See also
> Visual Installer: Prime number based license keys
> Visual Installer can show visually when a license key is correct
> The setup wizard in Visual Installer

