
![]() In MultiMailer it is possible to search after text in most of the lists in the program. For example, if you want to search for text in the mailing list (in the Mailing List tab), you can select the menu item Edit – Find or press the keys Ctrl F, and then type your search text in the dialog box that appears and click the Find button. MultiMailer will then search for and display the first line in the list where there is a match.
In MultiMailer it is possible to search after text in most of the lists in the program. For example, if you want to search for text in the mailing list (in the Mailing List tab), you can select the menu item Edit – Find or press the keys Ctrl F, and then type your search text in the dialog box that appears and click the Find button. MultiMailer will then search for and display the first line in the list where there is a match.
This is the traditional way to search. However, there is another method that can be faster in some contexts. If you want to search in the first column of the list (the leftmost column) and you know the first letters of the text you want to search for, you can type the text directly without opening a search box.

In MultiMailer, the first column usually contains email addresses, so if you type the first letters of the email address, MultiMailer automatically jumps to that row and selects it.
Example
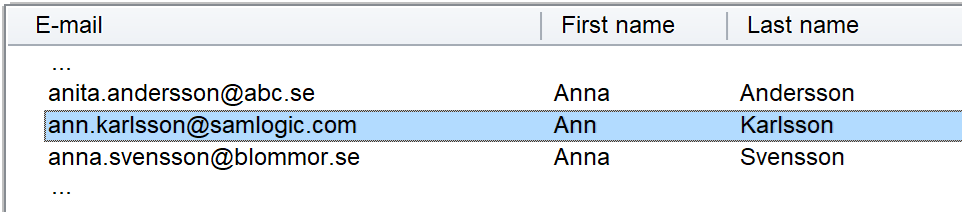
Suppose you want to quickly jump to the email address ann.karlsson@samlogic.com in a list with email addresses:
. . .
anita.andersson@abc.se
ann.karlsson@samlogic.com
anna.svensson@blommor.se
. . .
Then you just need to type the first letters of the email address, for example A N N, and that row will be highlighted. (You don’t need to press Enter, just type the letters.)
Works also in Visual Installer
The technique described above also works in Visual Installer. There it can for example be used to quickly find a specific file in the installation packages file list. You only need to enter the first letters of the filename, and you will have the row with the file selected in the file list.
 The email communication / delivery component
  There is now an update of

 It is possible to use a Google email server as a email delivery server when sending emails with


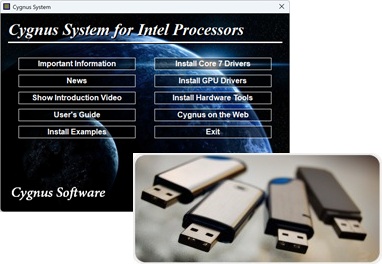 We have now released a new version of our USB autorun menu tool
  A new version of our menu designer tool
  In the latest
 There is now an update of