
![]() It is easy to create a menu interface with 2 columns with buttons in CD-Menu Creator. You only need to select the Double Columns option in the Buttons tab in CD-Menu Creator´s editor, and add your buttons. Then you will have a menu interface with two columns with buttons. If you click here you can see an example of such a menu.
It is easy to create a menu interface with 2 columns with buttons in CD-Menu Creator. You only need to select the Double Columns option in the Buttons tab in CD-Menu Creator´s editor, and add your buttons. Then you will have a menu interface with two columns with buttons. If you click here you can see an example of such a menu.
But what about a menu interface with 3 columns with buttons? Can this be easily done? Well, some more work is needed, but it is quite easy also. The tip below shows how to create a menu interface with 3 columns with buttons:
1. Start the CD-Menu Creator editor.
2. Open the Buttons tab.
3. Select Left in the Placement frame.

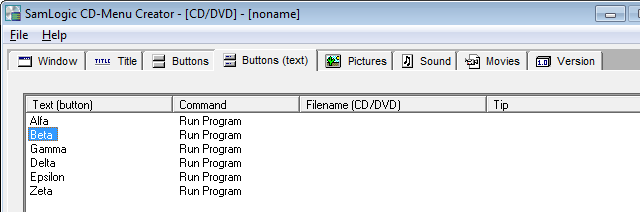
4. Open the Buttons (text) tab.
5. Click on the Add Button button.
6. Enter “Alfa” (or other text) in the Text (button) text box.
7. Click OK.
8. Click on the Add Button button again.
9. Enter “Beta” (or other text) in the Text (button) text box.
10. Click on the Options button.
11. Open the Position tab.
12. Select the Next free (horizontal/vertical) position option.
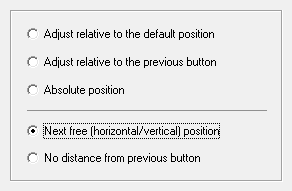
13. Click OK, and OK again.
14. Now select the button with the text “Beta” in the button list.
15. Click on the Copy Button button and click on Yes in the message box that is shown.
16. Repeat this process until you have 6 buttons in the list.
17. Double click on button 3, 4, 5 and 6 and enter “Gamma”, “Delta”, “Epsilon” and “Zeta” (or other text) so every button have a unique text.
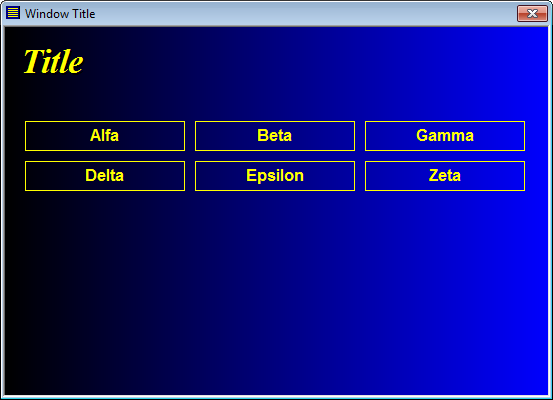
We have now created a menu interface with 6 buttons. To make the buttons appear in 3 columns you need to adjust the button width and the menu window width, so 3 buttons fits in one row without problem. You can for example enter the following dimensions:
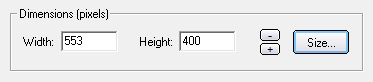
1. Open the Buttons tab.
2. Enter “160” at Width (this sets the button width).
3. Open the Window tab.
4. Enter “553” at Width (this sets the window width).
You can now preview the menu window (click on the Preview button). The menu window should look like this:
Instead of entering a width manually at step 4 above, you can click on the Size button and use the mouse to resize the menu window so it will have a proper width. The buttons will draw itself automatically when you adjust the menu windows width, and you can adjust the menu width until 3 columns with buttons are drawn and the distance between the rightmost button and the right border is ok.
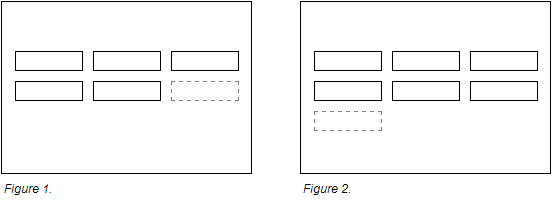
When you select the Next free (horizontal/vertical) position option (see step 12 above) this button will be drawn in the first free area to the right of the previous added button (see figure 1 below). If there is no free area to the right, the button is drawn on the next row instead (see figure 2 below).
More tips
More tips about how to use CD-Menu Creator is available on our tips & tricks page for the tool.