
As explained in this blog post, the %REG1 to %REG5 variables in Visual Installer get their values from the Windows Registry. But you should be aware of that there are two Registry in Windows – a 32 bit Registry and a 64 bit Registry – and your project settings will decide which of these Registry to use.
If you start Visual Installer’s editor and open the Setup options dialog box and the 32/64 bit tab, and look in the Bitness (32 or 64 bit) frame, you will see that there are two options that decide if the installation project is a 32 bit project or a 64 bit project (see the picture below):
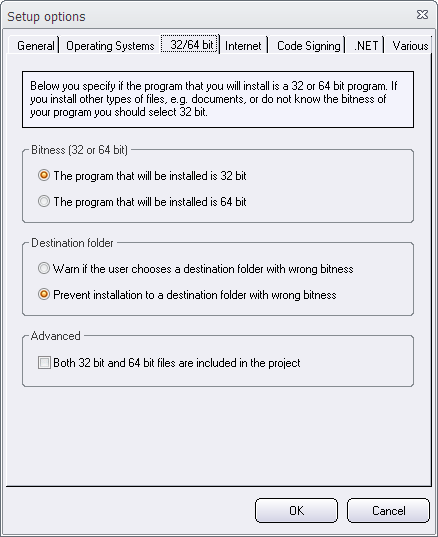
If you install 32 bit files you should select the first option (The program that will be installed is 32 bit) and if you install 64 bit files you should select the second option (The program that will be installed is 64 bit). The first option is always selected as default.
These options will also affect where the %REG1 to %REG5 variables get their values. If you have selected The program that will be installed is 32 bit, the variables will get their values from the 32 bit Registry and if you select The program that will be installed is 64 bit, the variables will get their values from 64 bit Registry.
There are two Registry editors in Windows
You should also be aware of that there exist two Registry editors in Windows. One of them handles the 32 bit Registry and one of them handles the 64 bit Registry. The filename of the Registry editor is always the same, regedt32.exe, but you can launch the different versions from different folders in Windows:
32 bit version: C:\Windows\SysWOW64
64 bit version: C:\Windows\System32
See also
> The %REG1 to %REG5 variables in Visual Installer
> The ‘Program Files (x86)’ and ‘SysWOW64’ folders explained