
![]() In Visual Installer you can protect an installation from unauthorized use in two ways: you can protect it with an license key or you can protect it with a password. License key protection and password protection works in a similar way, but there are differences. Below we explain some of the differences:
In Visual Installer you can protect an installation from unauthorized use in two ways: you can protect it with an license key or you can protect it with a password. License key protection and password protection works in a similar way, but there are differences. Below we explain some of the differences:
– When a user enters a license key, all characters that are entered are also shown on the screen. But if the user enters a password, only stars (*) are shown on the screen. Nobody can look on the screen and see which characters are entered.
– Passwords are case sensitive. License keys are not. So if you specify a password like “Orange“, only “Orange” will be accepted. Not “orange” or “ORANGE“. However, if you specify a license key as “Orange“, the user can enter “Orange“, “orange” or “ORANGE“. All three will be accepted by the setup program.
– Only one unique password can be specified for a specific installation. But if you use license keys, you can specify more than one key. In fact, you can specify thousands of unique license keys, if needed.

How to password protect an installation
Below we will show how to password protect an installation:
1. Start Visual Installer, and open an existing project or create a new one.
2. Open the Dialog boxes tab.

3. Select the Password option in the Dialog boxes tab.
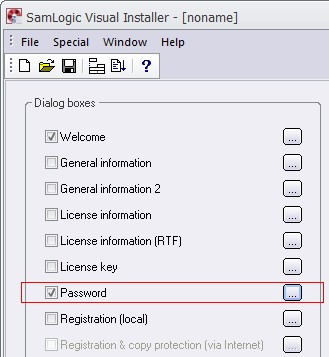
4. Click on the “…” button to the right of the Password option.
5. Enter a password in the Password text box in the Password dialog box.
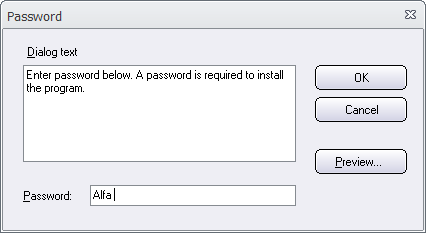
6. Click OK to close the Password dialog box.
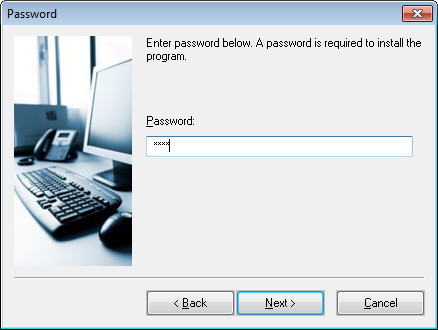
You can now create an installation and run it. The Password setup dialog box (see the picture below) will be shown in the setup wizard when you run the installation, and you can not continue the installation until you enter the correct password.
More tips
More tips for Visual Installer are available on this web page.