The ‘User Options’ setup dialog now also supports radio buttons

The User Options setup dialog box in Visual Installer has been updated to also support radio buttons. So you can now choose if you want to use check boxes or radio buttons in the installation dialog box. When you use radio buttons, only one option at a time can be selected. The options are mutually exclusive.

Below is a basic example of how the updated User Options dialog box may look like when using radio buttons:

The 'User Options' setup dialog box

As before, you can set the text for the dialog box title, the information area and the options freely. Switching between check boxes and radio buttons is done via a new setting in the editor:

The 'Settings' dialog box

More information about the ‘User Options’ setup dialog
In this blog post from 2016 you can read more about the User Options setup dialog. There is also a long tip available in this tip page.

You can now change font for Visual Installer’s and CD-Menu Creator’s editor

Using one and the same font in a software with all versions of Windows, graphic cards, displays and DPI settings, and expecting the result always to be perfect, is nearly an impossible mission. And then you must also take into account that people also prefer different fonts.

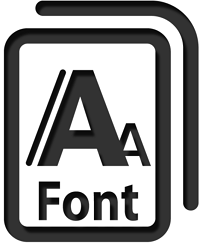
To handle this situation in the best way in our software we have updated Visual Installer and CD-Menu Creator to allow you to choose your own font for the editor. We have included some fonts that you can choose among, and we will increase the list with fonts with time.

Too large font size?
The new font handling in Visual Installer and CD-Menu Creator will also solve the problem with “too large font size” that sometimes happens when a system font with a requested size is not available in the system and the substitute font (chosen by Windows) is somewhat larger and the text will therefore not fit in the space that is reserved for the text. This is a rare condition, but will happen in special circumstances *.

In the latest version of Visual Installer and CD-Menu Creator this problem does not exists anymore because both editors will automatically search for a font that has the same size as the font that has a problem. So the editors will automatically switch font if this problem occur. But you can, of course, choose another font manually if you prefer to do this.

How to change font for the editor manually
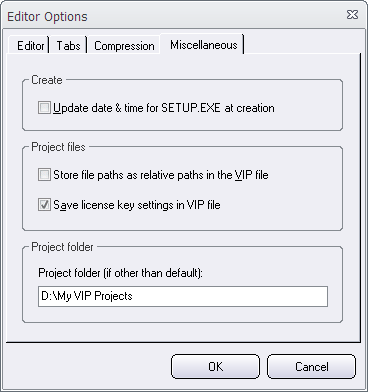
In Visual Installer you can change font by choosing the Editor options menu item in the Special menu. In CD-Menu Creator you can change font by choosing the Options menu item in the File menu. In both cases there will be a new Font tab available in the dialog box that is shown. Via this new tab you can change the font for the editor.


*) This problem may occur if the connected display is over a certain resolution when Windows is first installed in the computer. Windows will then set the DPI to 120 instead of the usual 96, and the “MS Sans Serif” font that Visual Installer’s and CD-Menu Creator’s editor uses as default may be affected by this. The font may not be available in smaller sizes. If this problem happens, it does not help that you afterwards change the DPI from 120 to 96. The font size is still not available. More information about this problem is available in this blog post on Microsoft’s blog.

Visual Installer 2018 has now been released

We have now released a new version of our setup tool SamLogic Visual Installer. The name of the new version is SamLogic Visual Installer 2018 and the version number is 11.5. Some new features in the new version are:

• Supports the latest version of Windows 10.
• Supports Microsoft .NET Framework 4.7 and 4.7.1.
• Supports AutoCAD 2018.
• A new function makes it easier to add all files in a folder to Visual Installer’s file list.
• The ‘User Options’ setup dialog box has been updated to also support radio buttons.
• The code signing function now supports USB tokens and EV digital certificates.
• All redistributable binary files are now code signed with an EV digital certificate.
• New script commands has been added to the script language.
• The XRUN script command has been updated to handle more options.
• You can now change the font for Visual Installer’s editor.

A detailed list of new features in Visual Installer 2018 is available on this web page.

CD-Menu Creator 2018 has now been released

A new version of our menu designer tool CD-Menu Creator has now been released. The name of the new version is SamLogic CD-Menu Creator 2018, and some of the new features in the new version are:

• Supports the latest version of Windows 10.
• You can now change font for CD-Menu Creator’s editor.
• Creation date of a menu is automatically saved in the Version tab of the editor.
• All redistributable binary files are now code signed with an EV digital certificate.
• Improved error handling.
• New menu interface examples have been included.

A more detailed list with the new features is available on this page.

How to check that a file is dual code signed

In Visual Installer 2015 we added a new function that makes it possible to dual code sign setup files. You can read about the new function in the following blog post:

> Visual Installer now supports SHA-2 and dual code signing

Before you distribute your installation package it can be a good idea to check that the dual sign process succeeded. You can do it easily by following the steps below:

1. Create your setup package from Visual Installer.
2. Locate the setup package file via Windows Explorer.
3. Right-click on the file.
4. Choose the Properties menu item in the local menu that is opened.
5. Open the Digital Signatures tab.

If the file has been successfully dual signed, there should be two rows in the signature list:

Windows Properties window

The digest algorithms should be sha1 and sha256, as shown in the picture above. If there is only one row in the signature list, the dual code sign process failed or you have not set Visual Installer to dual code sign setup packages. Read this tip to get more information about how to change code sign settings in Visual Installer.

See also
> What is SHA-1 and SHA-2 and what’s the difference between them?
> How to code sign a setup package (Visual Installer tip)

Visual Installer 2017 has now been released

We have now released a new version of our setup tool SamLogic Visual Installer. The name of the new version is SamLogic Visual Installer 2017 and the version number is 11.0. Some new features in the new version are:

• The support for Windows 10 has been improved.
• Supports Visual Basic 2017 / Visual Studio 2017.
• Supports AutoCAD 2017.
• Supports Microsoft .NET Framework 4.6.2.
• Supports Microsoft Edge.
• The file information window now displays info about digital certificates. Read more.
• Line breaks can now be included in message boxes that are opened via script. Read more.
• You can specify your own default folder for your Visual Installer project files. Read more.

A detailed list of new features in Visual Installer 2017 is available on this web page.

The file information window now displays info about digital certificates

Today it is important to code sign binary files (for example .EXE and .DLL files) before distribution. We have therefore updated the file information window in Visual Installer so it is easy to check if a file in Visual Installer’s file list is code signed or not. The picture below shows the updated file information window:

The File information window in Visual Installer

To the right of the Code signed? text field there will be a Yes if the file is code signed (has a digital certificate). Otherwise there will be a No.

The name of the organization that the digital certificate is issued to is displayed to the right of the Organization text field.

How to open the file information window
You can open the file information window by choosing the Show file information menu item in the List menu in Visual Installer’s editor, or by right-clicking over a file in the file list and choosing the Show file information menu item in the local menu that is opened.

You can now specify your own default folder for your project files

You can now specify your own default folder (start folder) for your Visual Installer project files (.VIP files). Normally is the Documents\Visual Installer\My Projects folder used as a default folder for Visual Installer’s project files, but now you can have your own default folder; for example D:\My VIP Projects, or whatever you want to have.

File - Open project
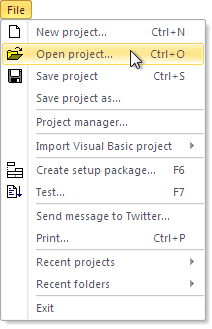
The default folder is used as a start folder when you have no project file opened in the Visual Installer editor, and want to open an existing project file (.VIP file), for example via the File – Open project menu item. The start folder is opened first. Thereafter you can browse to another folder on the drive if your project file is not located in the start folder.

(If you already have a VIP project opened in the editor, the folder where this project file was last saved in, will be used as a start folder.)

How to change the default folder for projects
You can set a new default folder via the Editor Options dialog box in Visual Installer. This dialog box can be opened by choosing the Editor options menu item in the Special menu in Visual Installer’s editor. A new default folder can be entered in the Project folder textbox (in the Miscellaneous tab). See the picture below for an example.

The Editor Options dialog box in Visual Installer

You must enter a full path to an existing folder in the Project folder text box. The drive letter must be included in the path.

If you want to use Visual Installer’s built-in default folder (Documents\Visual Installer\My Projects) as a start folder for your projects again, you can erase the contents in the Project folder text box. You only need to specify a folder in the Project folder text box if you want to use your own start folder.

CD-Menu Creator 2017 has now been released

A new version of our menu designer tool CD-Menu Creator has now been released. The name of the new version is SamLogic CD-Menu Creator 2017 and some of the new features in the new version are:

• The support for Windows 10 has been improved.
• All binary files in CD-Menu Creator are now SHA-2 code signed. Read more.
• You can now create button groups with titles. Read more.
• We have added more symbolic icons for the menu window.
• New menu interface examples have been included.

A more detailed list with the new features is available on this page.

CD-Menu Creator: You can now create button groups with titles

We have added a new function to CD-Menu Creator 2017 that allows you to place buttons in groups and add a title to each group. If you have many buttons in a menu this will help your user find the correct button faster. Below are two menu examples that show how it may look like:

Example 1: One column with buttons + two groups with buttons + Exit button
Menu example 1

Example 2: Two columns with buttons + four groups with buttons
Menu example 2

It is easy to create button groups and add titles to the groups. In this new tip on our website we will show you how to create button groups with titles.