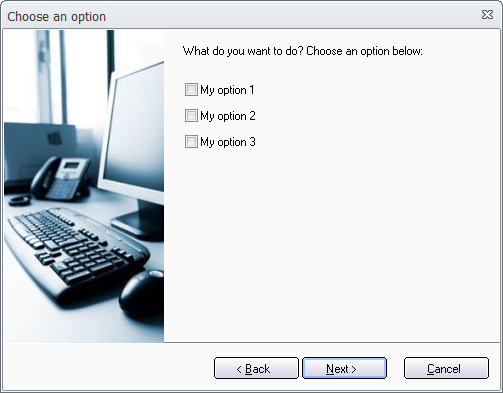
We have added a new setup dialog box to the Professional version of Visual Installer. The name of the dialog box is User Options and it is a general dialog box where the user can select and unselect options that you add to the setup project. These options co-operates with conditional statements in Visual Installer’s scripting language and with Visual Installer’s Registry tab. Below is an example of how the User Options setup dialog box may look like and how it can be used:
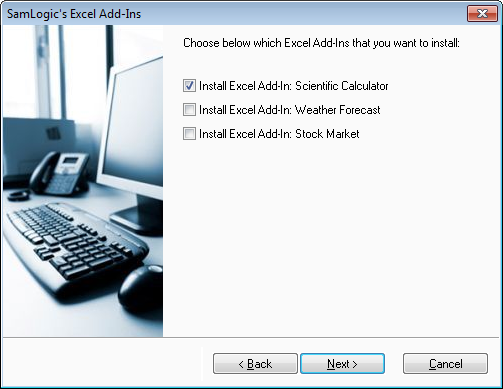
In the example above we have added three options to the setup dialog box. The user can select and unselect the options of his/her choice.
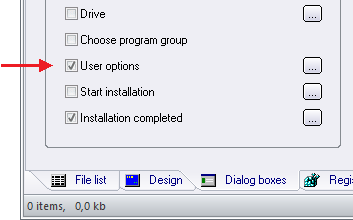
To activate this dialog box, you need first open the Dialog boxes tab in Visual Installer’s editor and check the User options option:
Then you can click on the button marked “…” to the right of the option. This will open a new dialog box in the Visual Installer editor with the title User Options. Below we have filled the dialog box with the text and options that is needed to create the setup dialog box in the example above:
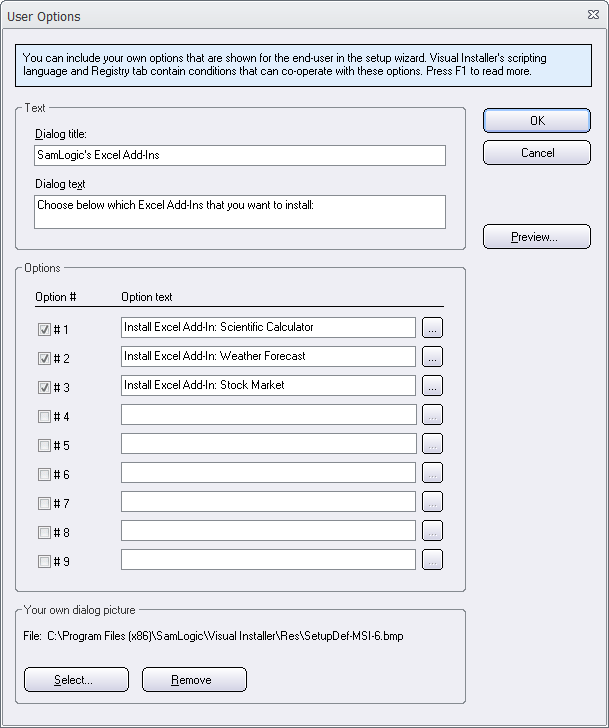
As you see, it is very easy to create a setup dialog box with your own options. You just need to enter a title, a short description text and your options. And it is done!
Co-operates with Visual Installer’s scripting language and ‘Registry’ tab
The main purpose of this new option dialog box is to let the end-user decide which script lines to execute and which keys and values to add to the Registry, during the setup process. This is a more flexible way to handle user choices than file components (file groups) because you don’t necessary need to copy files based on user choices; instead you can use Visual Installer’s whole scripting language to do whatever you want. This is useful if some special operations must be done, based on user choices.
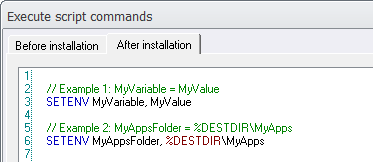
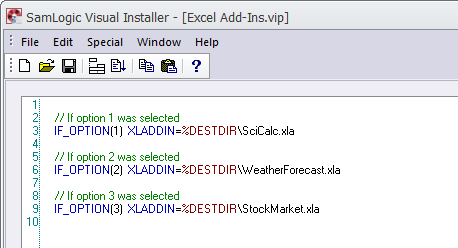
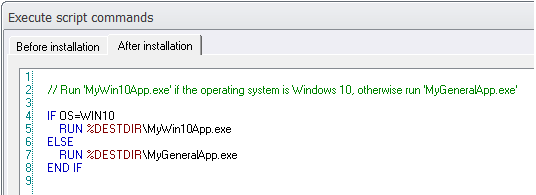
Below we show how Visual Installer’s scripting language can co-operate with the User Options dialog box:

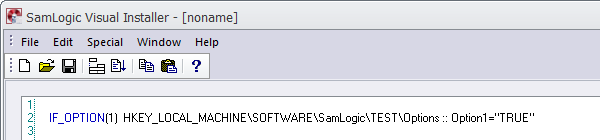
And below we show how the Registry tab in Visual Installer can co-operate with the User Options dialog box:
Scripting language
In Visual Installer’s scripting language we have added a new condition check, IF OPTION(n), that can be used to check which options the user has selected in the User Options setup dialog box. We have added a similar condition check to Visual Installer’s Registry tab: IF_OPTION(n).
The IF OPTION(n) condition in the script language can check both if an option is ON (selected) or OFF (unselected). So for example to examine if option 2 was selected by the end-user, you can enter the following condition:
IF OPTION(2)=ON
…
END IF
If you for example need to examine if option 3 was not selected, you can enter the following condition:
IF OPTION(3)=OFF
…
END IF
‘Registry’ tab
The condition check in the Registry tab works in a similar way. IF_OPTION(n) or IF_OPTION(n)=ON can be used to examine if an option was selected by the end-user. IF_OPTION(n)=OFF can be used to check if an option was not selected.
If you use IF_OPTION(n) and the option number n was selected by the end-user, the key or value will be added to the registry. The example below shows how to examine if option number 1 is selected, and if yes, add a value to registry:
See also
> Tip: How to use the ‘User Options’ dialog box with script

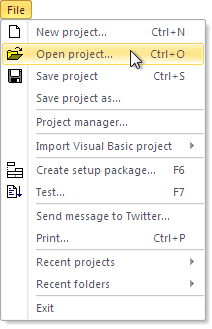 The default folder is used as a start folder when you have no project file opened in the Visual Installer editor, and want to open an existing project file (.VIP file), for example via the File – Open project menu item. The start folder is opened first. Thereafter you can browse to another folder on the drive if your project file is not located in the start folder.
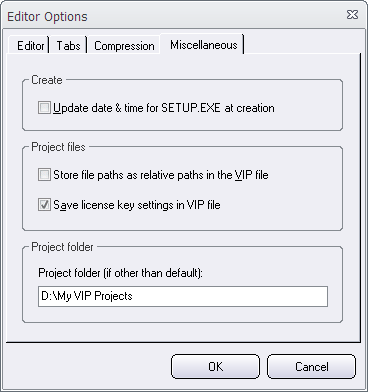
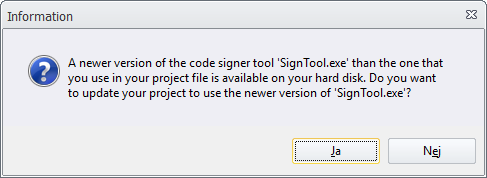
 There is now an update of
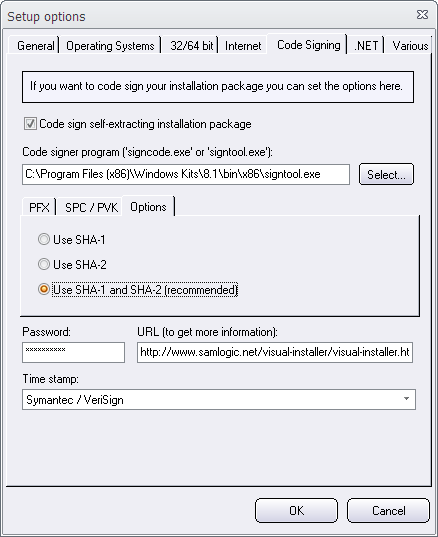


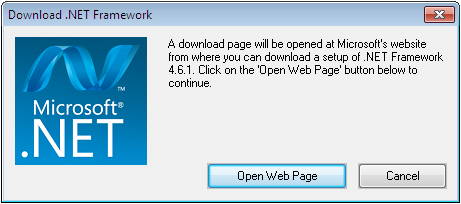
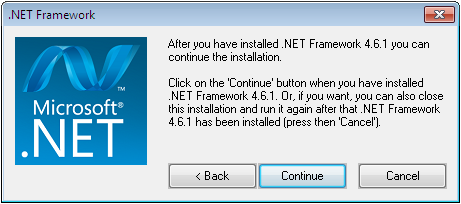
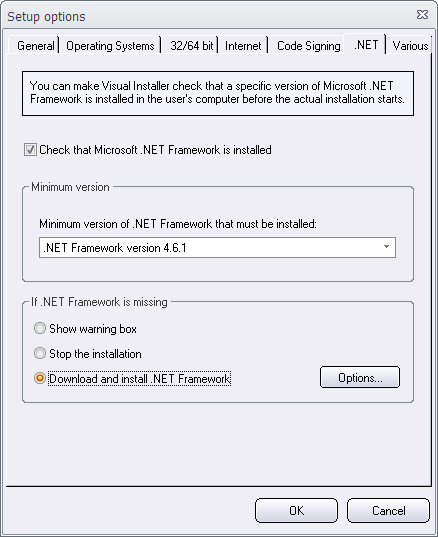
 Since January 1, 2016, Windows 7 and newer Windows will no longer trust software that is signed with a SHA-1 code signing certificate, if the software is downloaded from the Internet and the software is time-stamped with a value greater than January 1, 2016. This means that if you code sign a binary file (for example an EXE file) this year and uses SHA-1 as a hash algorithm, it will not be trusted in newer Windows. Instead you must use a SHA-2 (SHA-256) code signing certificate; then the binary file will be trusted by Windows 7 and newer. You can read more about this in the following articles on Microsoft’s website: