 There is now an update of SamLogic Visual Installer 2014 available. The version number is 10.0.27, and some of the news and improvements in this version are:
• A German language file is now included. Texts in setup dialog boxes and message boxes etc. can now be displayed in German in an easy way. Read more.
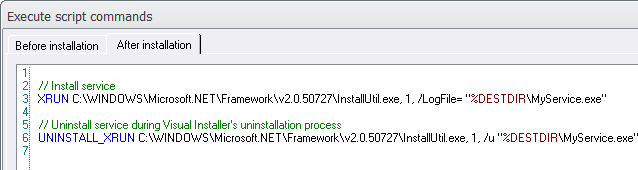
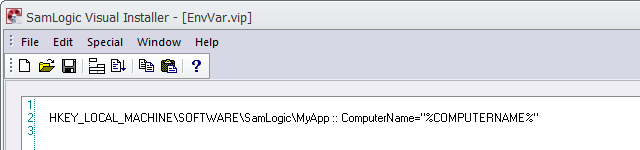
• A new script command: UNINSTALL_XRUN. Can be used to run a program during an uninstallation. It works like XRUN, but the command is executed during the uninstallation process. This command is useful if some special processing must be done during the uninstallation process, for example to uninstall a Windows service that was installed during the installation process. The picture below shows an example of usage. Read more.
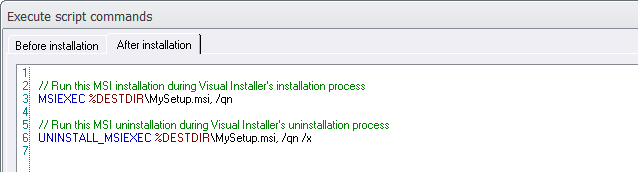
• A new script command: UNINSTALL_MSIEXEC. Can be used to run an external MSI installation or uninstallation during an uninstallation process. By combining MSIEXEC with UNINSTALL_MSIEXEC you have a nice and easy way to handle both installations and uninstallations of MSI files. The picture below shows an example of usage. Read more.
• Improved error handling when using the code signing functions in Visual Installer.
• Improved error handling when adding files to Visual Installer’s file list through a .DEP file.
• Easier to install side-by-side system files / runtime files like MFC42.DLL.
We have also fixed some bugs and other issues that have been reported. For example:
• Forward slashes in the main destination folder made the installation to fail. Visual Installer now converts forward slashes (“/”) to backslashes (“\”) automatically.
• If the source path was a UNC file path (a file path that starts with “\\”) the installation sometimes failed. Visual Installer now checks that the source path starts with a drive letter.
• Some updates in the English languages file. We have removed some outdated text.


How to download the update
If you have Visual Installer 2014 and a 12 months maintenance plan you can download the update from the following download page:
> Download – Visual Installer 2014 – Latest update
If you have an older version of Visual Installer, for example Visual Installer 2012, you can upgrade to the latest version of Visual Installer from this order page:
> Upgrade to Visual Installer 2014

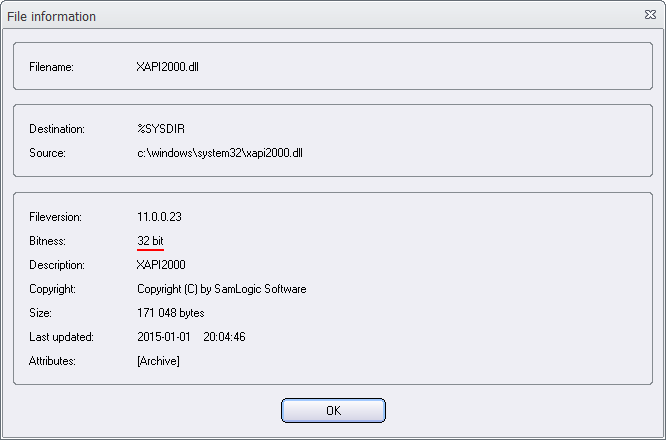
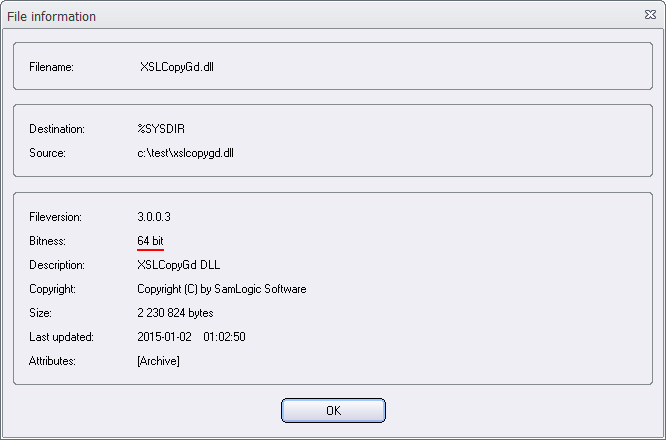
 An .EXE file, a .DLL file and a .OCX file (and some other binary file types) can be compiled as a 32 bit file or a 64 bit file. In many cases you can find out whether the file is 32 bit or 64 bit by using one of the following methods: