Today it is very important to code sign binary files (for example .EXE and .DLL files) that are distributed to other computers. By code signing your files you will protect your files against viruses and malware and avoid deterrent warning messages in Windows.
![]() In our setup tool Visual Installer it is easy to check if a file in Visual Installer’s file list is code signed or not. You can check if a file is code signed by right-clicking on the file in the list with files in the File list tab in Visual Installer’s editor, and thereafter choosing the Show file information menu item in the menu that appears. The following dialog box will be shown:
In our setup tool Visual Installer it is easy to check if a file in Visual Installer’s file list is code signed or not. You can check if a file is code signed by right-clicking on the file in the list with files in the File list tab in Visual Installer’s editor, and thereafter choosing the Show file information menu item in the menu that appears. The following dialog box will be shown:
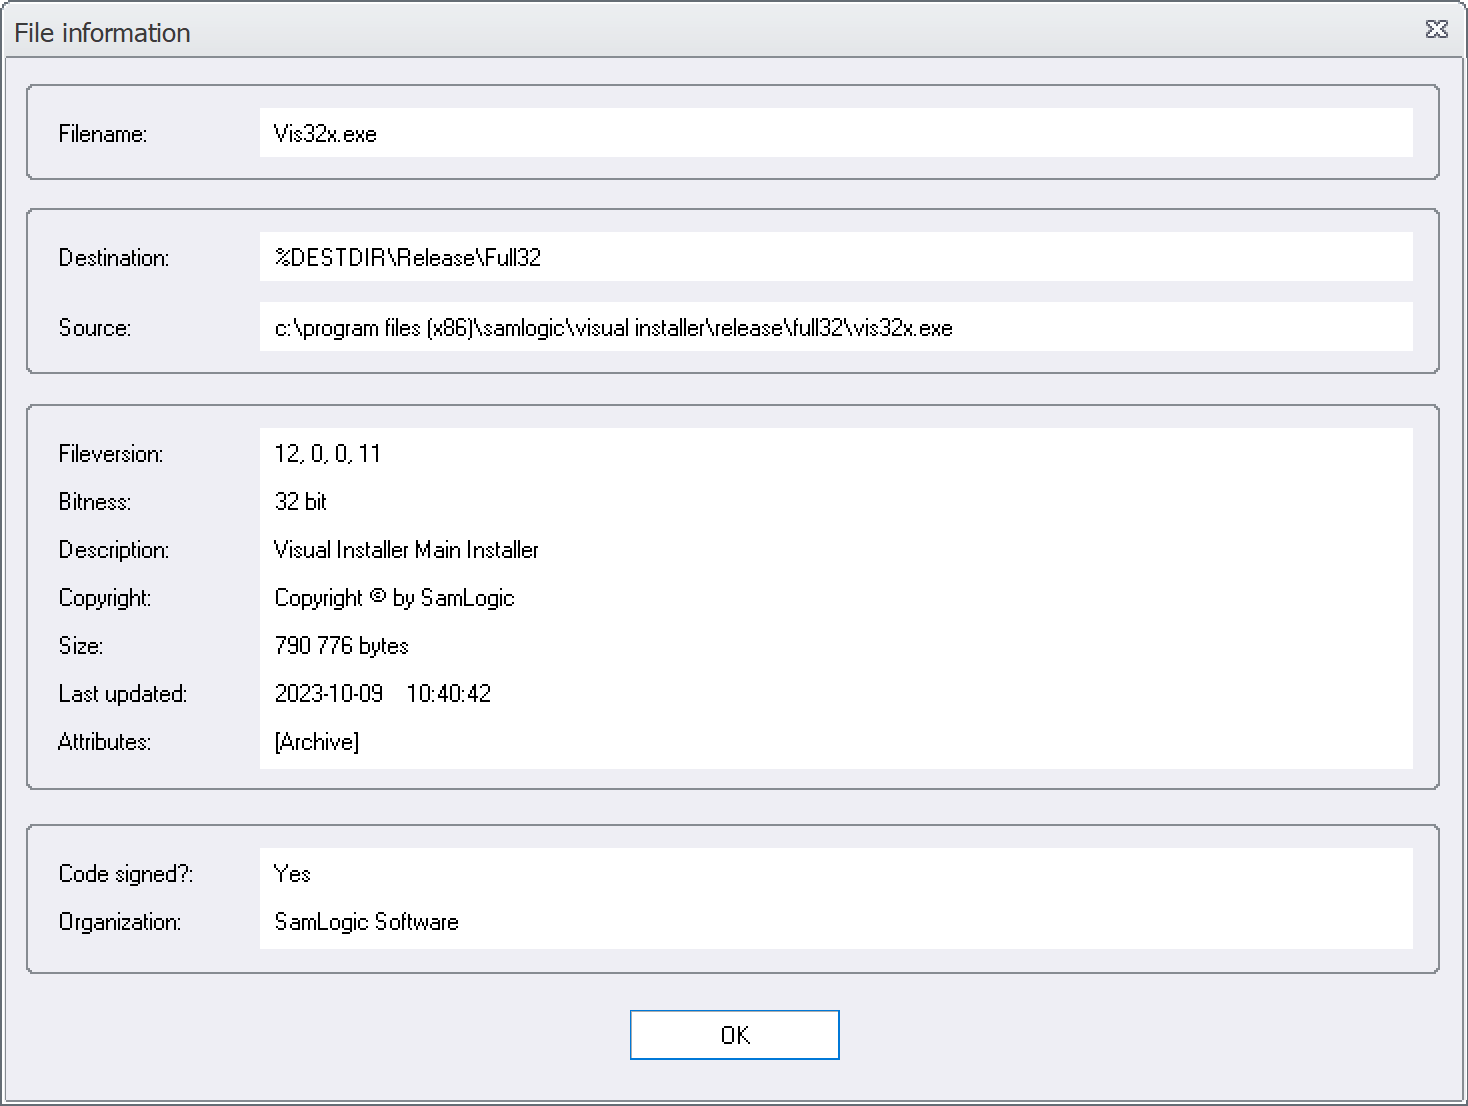
To the right of the Code signed? text field there will be a Yes if the file is code signed (has a digital certificate). Otherwise the text will be No.
The name of the organization that the digital certificate is issued to is displayed to the right of the Organization text field in the same frame.
See also
> Tip: How to code sign a setup package in Visual Installer
> What is Code Signing / Digital Signature / Digital Certificate?
> Extended Validation (EV) Code Signing
> SamLogic uses a digital certificate from Sectigo for its software