In this blog post we explained how to use variables in Visual Installer. Many variables get their values automatically from known locations in Windows Registry, but there are also some variables in Visual Installer that can obtain their values from locations in Windows Registry that you specify.
The %REG1 to %REG5 variables
There are five variables in Visual Installer that can obtain their values from keys and value names in the Windows Registry that you specify. They have the following names: %REG1, %REG2, %REG3, %REG4, and %REG5.
How to specify a location in Registry to read
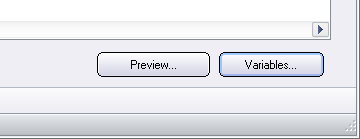
To specify a key and value name in the Registry for any of these variables, you must first open the Variables dialog box in Visual Installer’s editor. You can do this by first opening the Registry or INI files tab in Visual Installer’s editor, and then click on the Variables button, that is located at the bottom right of the editor:
The following dialog box will be opened if you click on the button:
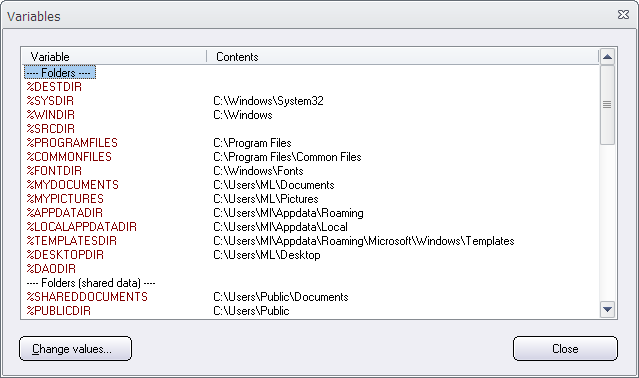
If you scroll to the bottom of the list, you will find the User variables section:

As default, these variables are empty but you can specify a key and value name for them by clicking on the Change values button (in the bottom left), and then specify the information in the Change contents for variables dialog box that is opened:
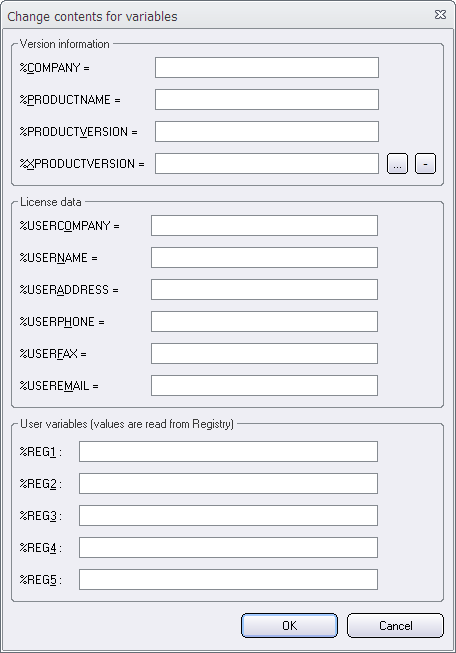
To specify a key and value for example for the %REG1 variable, you need to enter the information at the %REG1 text box in the User variables section. For example like this:
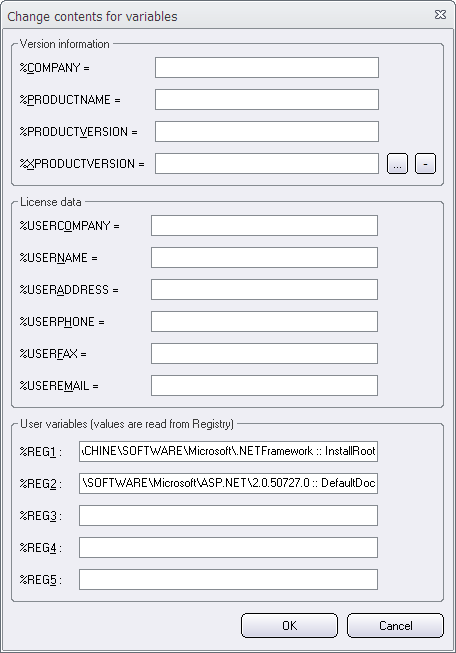
HKEY_LOCAL_MACHINE\SOFTWARE\SamLogic\Visual Installer\10.5 :: Path
“HKEY_LOCAL_MACHINE\SOFTWARE\SamLogic\Visual Installer\10.5” is the key and “Path” is the value name. You can read more about this format in Visual Installer’s User Guide.
In the picture below we have specified keys and values for both the %REG1 variable and the %REG2 variable:
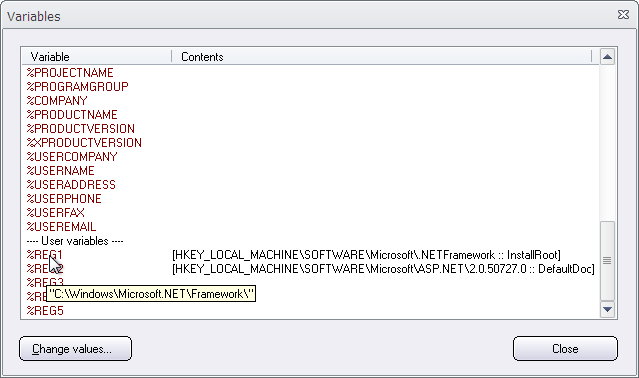
You can click OK to save the keys and value names. In the Variables dialog box you will now see the information that you entered in the previous dialog box in the Contents column of the variable list. You can also see the current value for the variable (that is read from the Registry) by hovering the mouse pointer over the variable name, as shown in the picture below:
During the installation, the %REG1 to %REG5 variables will read its contents from the end-users Registry. If no contents is available, the variables will be empty.
See also
> Your project’s bitness affects where the %REG1 to %REG5 variables get their values
> Variables in Visual Installer


 Before AutoRun can work with USB flash drives in a computer, our AutoRun driver must be installed in the computer. You can distribute the AutoRun driver with your USB stick or you can let the user download and install it from the Internet.
 But starting with version 8.5.3 of
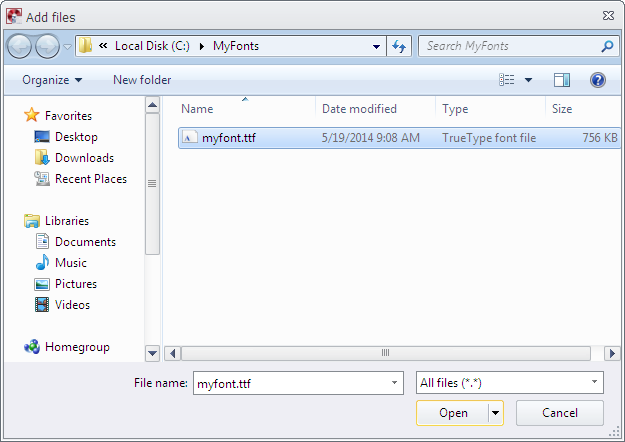
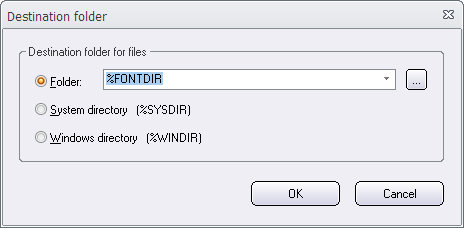
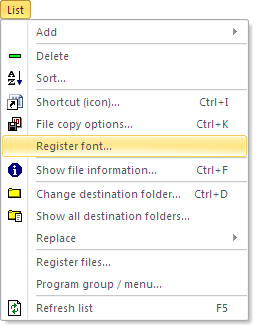
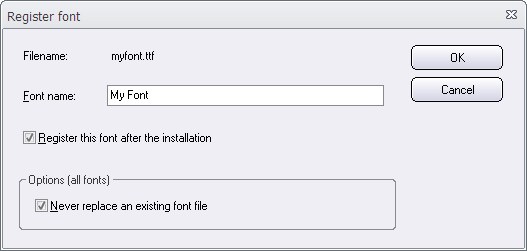
 Sometimes the fonts that are included in Windows are not enough, and you need to distribute your own font(s) with your software. But before they can be used in another computer, they must be installed in the right system folder and registered in the system.