One useful function in the Visual Installer setup package creator is the possibility to add version information to a self-extracting setup package. You can for example add version number, product name, company name and copyright text. The version information can be seen in Windows Explorer and in other places in Windows.
Where in Visual Installer can the version information be entered?
You can enter the version information in the Version information dialog box in Visual Installer. The dialog box can be opened via the Special – Version information menu item in the Visual Installer editor. The screen dump shows how the dialog box looks like:
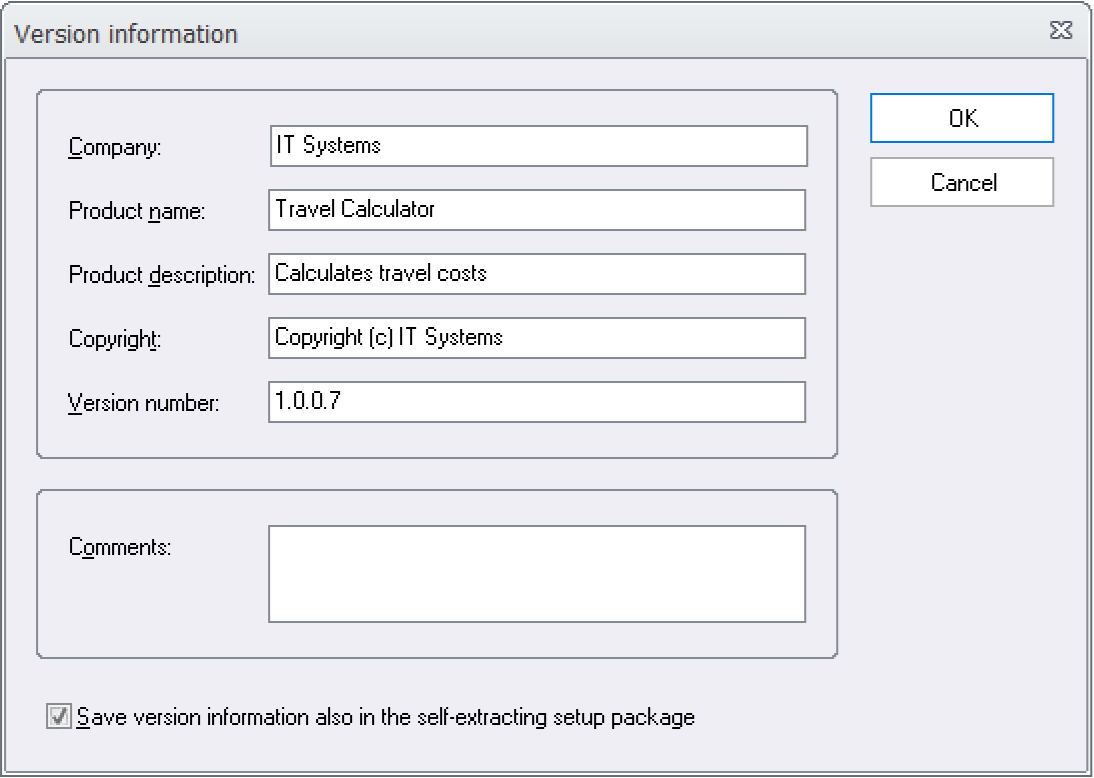
In this dialog box you can also find an option (a check box) with the text Save version information also in the self-extracting setup package and if you select this option, the version information that you enter in this dialog box will be stored in the setup package file. If the option is not selected, no version information will be stored in the setup package.
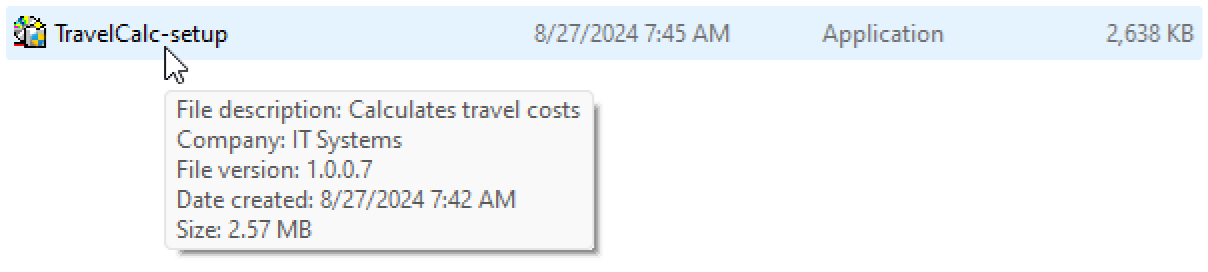
The version information can be viewed in Windows Explorer
If you have chosen to add version information to the setup package, the information can be shown in Windows Explorer and other places in Windows. For example, when the mouse pointer is above the filename in Windows Explorer, a tip text with the version information is displayed (as shown in the picture below):
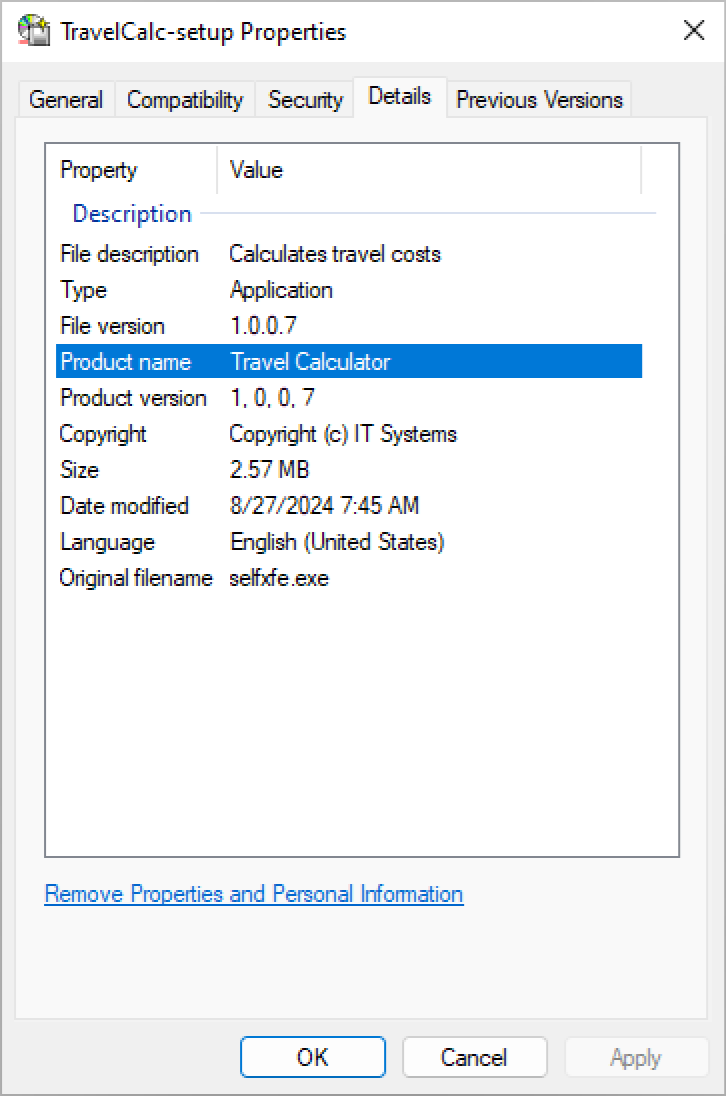
Also the Details tab in the Properties dialog box in Windows Explorer contains this information (the dialog box can be opened by right-clicking on the filename and choosing the Properties menu item). The picture below shows how the information is shown in the Details tab if the text that was entered in this blog post’s first picture is included in the setup package:
Version number
If you want to add a version number to the setup package, you must use 4 numbers when you specify the version number; for example: 1.2.0.5. Both commas and semicolons are allowed to use as a delimiter. So it is also ok to enter the version number like this: 1,2,0,5.
If you use more than or less than 4 numbers for the version number (for example 1.2) the version number is not stored in the setup package. If you want a version number like this to be stored in the setup package, you can extend the version number with zeros and enter the version number in this way: 1.2.0.0.
Read also
> How to create a self-extracting setup package