![]() We have improved Visual Installer’s behaviour in situations where a required version of Microsoft .NET Framework is missing in a computer. Before you could choose between stop the installation or warn the user if a specific version of .NET Framework was missing in the end-user´s computer. But now you can also let the end-user download the missing version of .NET Framework from the Internet and install it. Or, if you distribute .NET Framework with your software, you can start an installation of Microsoft .NET Framework directly from Visual Installer.
We have improved Visual Installer’s behaviour in situations where a required version of Microsoft .NET Framework is missing in a computer. Before you could choose between stop the installation or warn the user if a specific version of .NET Framework was missing in the end-user´s computer. But now you can also let the end-user download the missing version of .NET Framework from the Internet and install it. Or, if you distribute .NET Framework with your software, you can start an installation of Microsoft .NET Framework directly from Visual Installer.
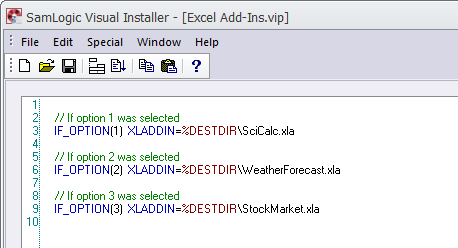
This was partially possible already in earlier versions of Visual Installer / Professional using script commands, but now this can be done without script. You can choose if you want this behaviour by selecting an option in Visual Installer’s editor.
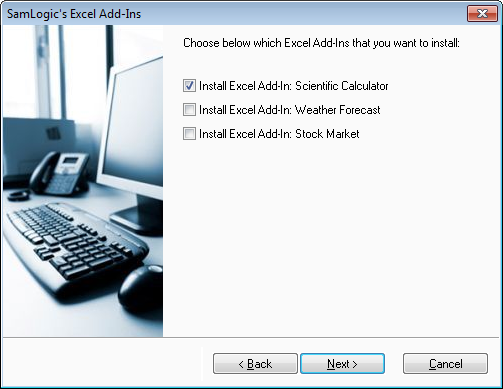
How it works
If Visual Installer discovers during the installation of your software that the required version of Microsoft .NET Framework is missing, a mini wizard is started. The mini wizard will help the end-user to start an installation of .NET Framework. Visual Installer pauses the installation until .NET Framework is installed. The pictures below show an example of how it may look like:
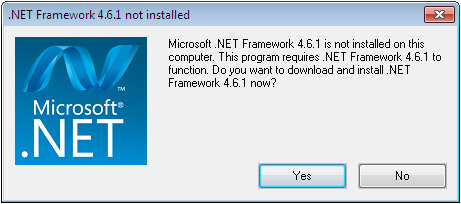
Step 1 – Initial information
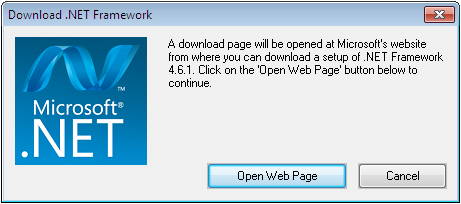
Step 2 – Download information
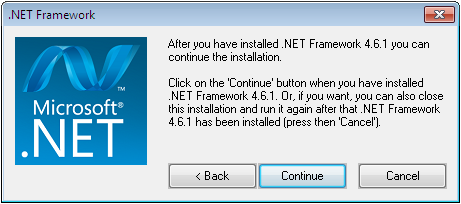
Step 3 – Information about how to continue
Where to find this new functionality?
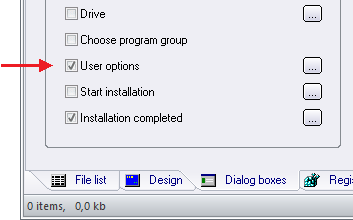
You can turn on and off this new functionality by opening the Special – Setup options menu item and opening the .NET tab:
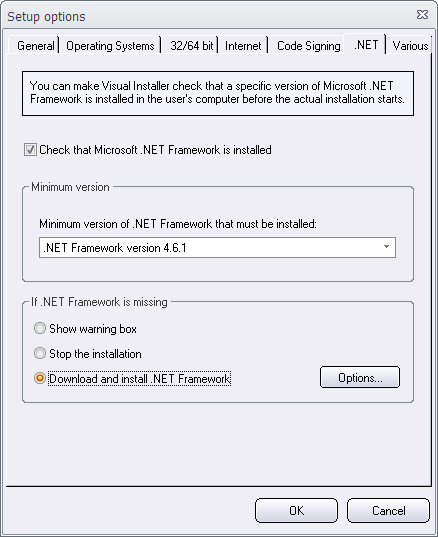
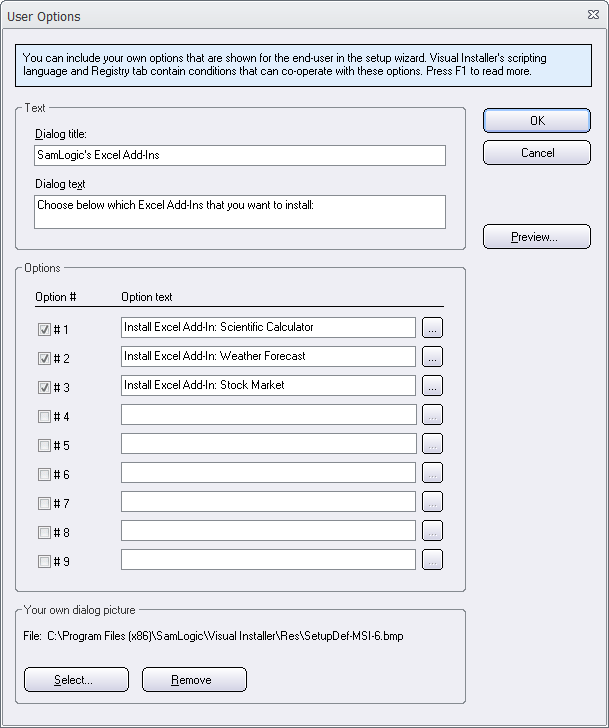
In the .NET tab you will find a new option named Download and install .NET Framework. If you select this option, the new behaviour will be invoked if the required version of .NET is missing in the end-user’s computer. If you click on the Options button, you can set some options for this new function. You can for example specify your own download page if you don’t want to use the default download page at Microsoft’s website. You can also specify a language for the download page.
See also
> Visual Installer: More available versions of .NET Framework
> Tip: How to prevent an installation if wrong .NET version